That unsightly black (or sometimes pink!) mold creeping along your shower caulking? Yeah, nobody wants that. Besides being an eyesore, mold can be a health hazard, especially for those with allergies or respiratory issues. But don’t worry, learning how to remove shower caulk mold isn’t as daunting as you might think. With a little elbow grease and the right approach, you can restore your shower to its former glory, making it a clean and inviting space for everyone, including considerations like shower bench height and depth for added comfort and accessibility.
Understanding the Enemy: Why Mold Loves Your Shower
Mold thrives in damp, warm environments, making your shower its ideal playground. Every time you shower, moisture gets trapped in the porous caulking, creating a perfect breeding ground for these microscopic invaders. To combat this issue effectively, it’s important to maintain a clean and dry space. You can also explore Rusticdecorliving blog for tips on keeping your bathroom mold-free while enhancing its aesthetic appeal.
Gathering Your Arsenal: Tools for Mold Removal
Before you declare war on mold, make sure you have the following weapons in your cleaning arsenal:
- Cleaning Solution: You have a few powerful options here:
- Bleach: A classic mold killer, but use it with caution as it can damage certain surfaces and is harsh on the lungs. Dilute 1 part bleach with 3 parts water.
- Vinegar: A natural alternative to bleach, white vinegar is less potent but still effective against mold. Use it undiluted for best results.
- Baking Soda Paste: Mix baking soda with a little water to form a thick paste. It’s less harsh than bleach and has mild abrasive properties.
- Hydrogen Peroxide: Another effective mold fighter, hydrogen peroxide can be used undiluted on stubborn stains.
- Spray Bottle: For easy application of your chosen cleaning solution.
- Scrub Brush: An old toothbrush, a grout brush, or even a stiff sponge will do the trick.
- Rubber Gloves: Protect your hands from harsh chemicals.
- Eye Protection: Especially important when working with bleach.
- Ventilation: Open a window or turn on the exhaust fan to ensure good airflow.
- Optional: Cotton balls, paper towels, masking tape.
The Battle Plan: Step-by-Step Mold Removal

- Prepare the Battlefield: Clear away any shower products and toiletries. Sweep or vacuum the shower floor to remove loose debris that can interfere with cleaning.
- Ventilate: Open a window or turn on the exhaust fan to circulate fresh air and avoid inhaling fumes from cleaning products.
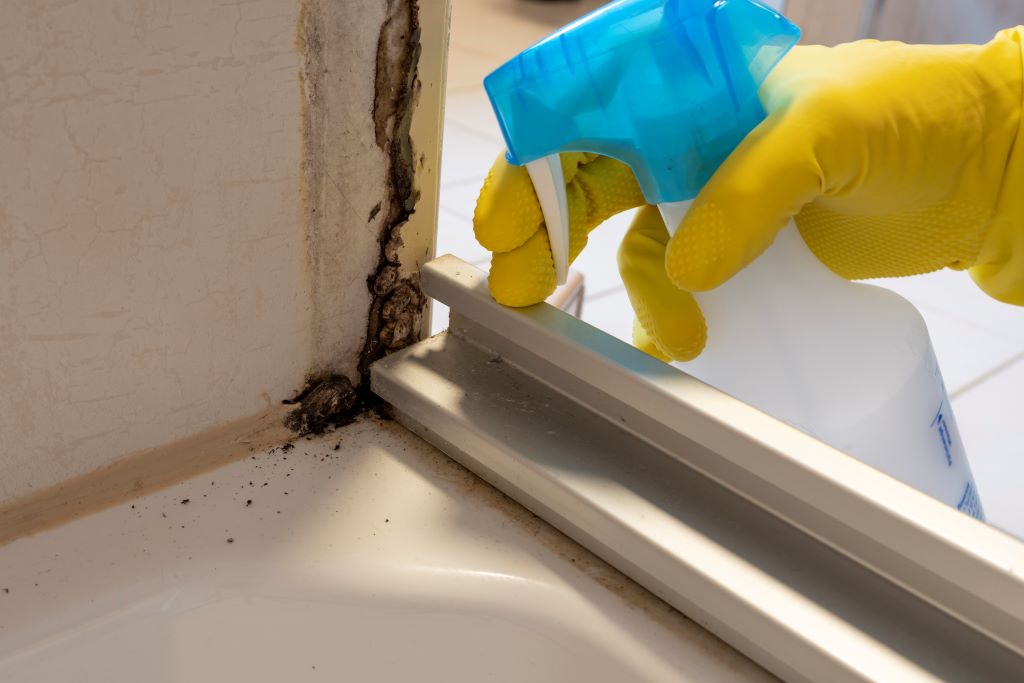
- Apply Your Weapon: Spray your chosen cleaning solution generously onto the moldy caulking. Make sure to saturate the affected areas thoroughly.
- Let it Dry: Allow the cleaning solution to sit on the mold for at least 15-30 minutes. This gives it time to penetrate and break down the mold. For stubborn mold, you can apply the solution and leave it overnight. A helpful trick is to soak cotton balls in the solution and place them along the caulk line, then cover them with plastic wrap to prevent drying.
- Scrub Away: Put on those gloves and get scrubbing! Use your brush to vigorously scrub the moldy areas. You’ll notice the mold starting to lift and disappear. For tough spots, reapply the cleaning solution and scrub again.
- Rinse and Repeat: Rinse the area thoroughly with clean water, ensuring all traces of the cleaning solution are gone. If you still see mold, repeat the process.
- Dry Thoroughly: Use a clean cloth or paper towel to dry the caulking completely. This is crucial to prevent mold from returning.
Preventing Future Invasions: Keeping Mold at Bay
Congratulations, you’ve won the battle! But the war against mold is ongoing. Here’s how to keep your shower mold-free:
- Reduce Moisture: The key to preventing mold is to keep your shower as dry as possible. After each shower, squeegee the walls and door to remove excess water. Leave the shower door or curtain open to allow air circulation.
- Ventilate Regularly: Use the exhaust fan during and after showers to remove moisture-laden air.
- Clean Regularly: Don’t wait for mold to appear. Wipe down your shower walls and caulk weekly with a mild cleaner or a vinegar solution.
- Inspect Regularly: Keep an eye out for any signs of mold growth, especially in corners and crevices. Early detection makes removal much easier.
Carpet Cleaning Stairs With a Vacuum and Brush for Spotless Results
Beyond Cleaning: When to Replace Caulk
Sometimes, even the most thorough cleaning won’t be enough. If the caulking is old, cracked, or peeling, it’s time for a replacement. This will not only improve the appearance of your shower but also prevent water from seeping in and creating a mold haven.
We Think You’ll Love: The Homeowner’s Guide to Seasonal Deep Cleaning and Maintenance: Making Spring Cleaning a Breeze
A Word of Caution:
- Always test your cleaning solution in an inconspicuous area first to ensure it doesn’t damage your shower surfaces.
- Never mix bleach with ammonia or other cleaning products, as this can create toxic fumes.
- If you have sensitive skin or respiratory issues, consider wearing a mask while cleaning with strong chemicals.
- If you have a persistent mold problem or are concerned about the type of mold, consult a professional.
With these tips and a little effort, you can conquer shower caulk mold and enjoy a clean, healthy, and beautiful bathroom. So gear up, grab your cleaning supplies, and reclaim your shower from those pesky mold invaders!