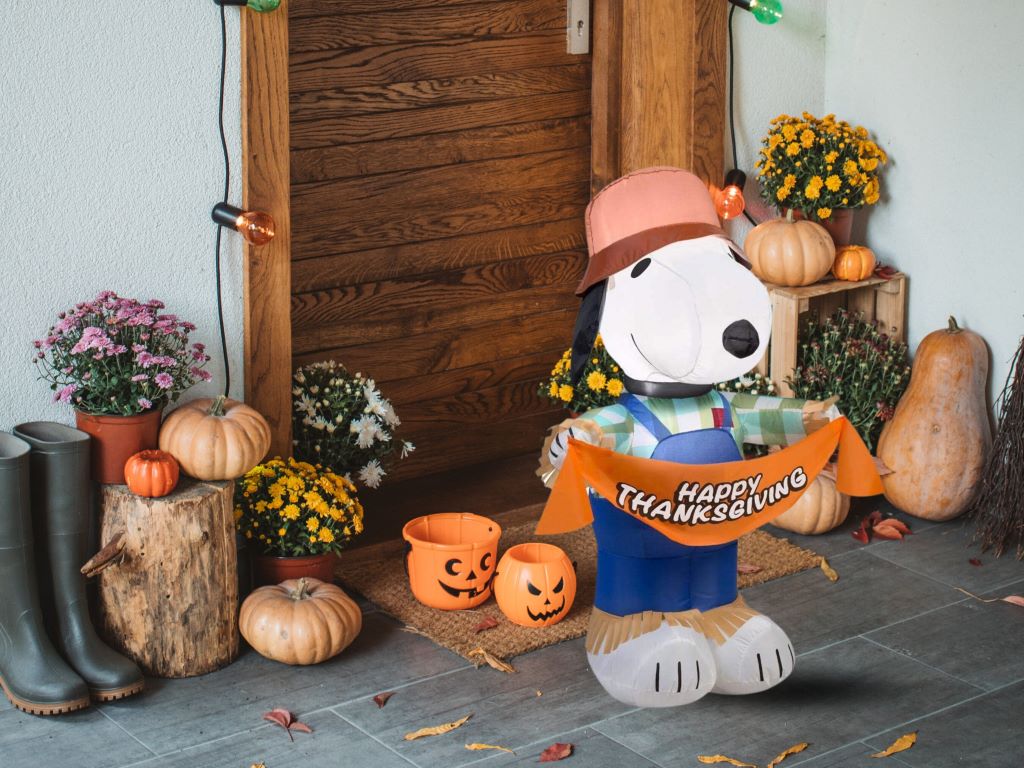
Thanksgiving is a significant holiday celebrated with loved ones while expressing gratitude. For many families, the Peanuts gang, particularly Snoopy, have become a treasured part of their Thanksgiving traditions. Engaging kids in holiday preparations by creating snoopy thanksgiving decorations and crafts can be a fun activity. You can easily make budget-friendly Snoopy-inspired decor by using a few simple materials perfect for the occasion.
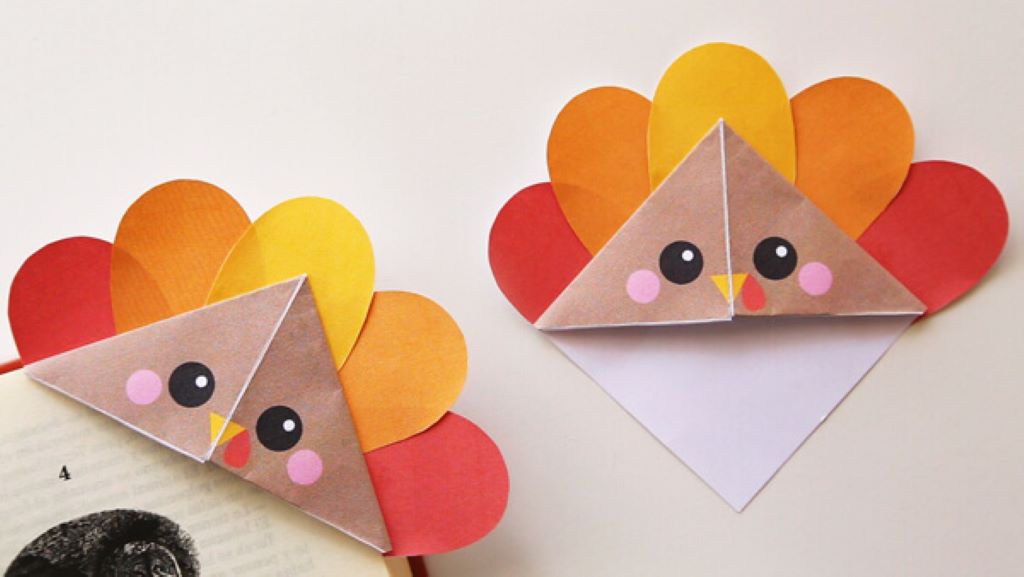
Snoopy Handprint Turkey Craft
Handprint crafts make for great keepsakes, and this Snoopy turkey is a Snoopy Thanksgiving decoration. The simplicity of this project makes it ideal for preschoolers and kindergarteners.
You will need:
- Red, yellow, orange, and brown paint
- Paper plate
- Googly eyes
- Red pom pom or foil
- Glue
Instructions:
- Have your child paint the bottom of their hand with brown paint and stamp it onto the paper plate. This will be the turkey’s body.
- Now paint your child’s thumb with orange paint and press it next to the body to make the beak.
- For Snoopy’s head, paint your child’s hand with yellow paint and press it above the body, overlapping slightly.
- Use the red pom pom or foil to make the nose and googly eyes for the face.
- Cut out a red feather shape and glue it to the turkey’s head to create Snoopy’s iconic feather.
- Once dry, display your Snoopy turkey proudly or give as a homemade Thanksgiving gift.
“I’m Thankful for…” Snoopy Craft
Having the kids write what they are thankful for is a nice way to connect Thanksgiving with gratitude. With this Snoopy craft, kids can write or draw the things they appreciate most on a Snoopy cut-out.
You will need:
- Printed Snoopy template
- Construction paper
- Markers, crayons, or colored pencils
- Scissors
- Glue
Instructions:
- Print out a Snoopy template, enlarging it to fill an 8.5 x 11 sheet of paper.
- Cut out the Snoopy shape. Trace onto construction paper if you want a colored background.
- Have kids decorate Snoopy with markers, crayons, etc. They can draw Snoopy’s outfit or leave him plain.
- On the belly, have them write or draw pictures of things they are thankful for – family, friends, pets, etc.
- Glue Snoopy onto a piece of construction paper or cardstock to finish.
- Display on the fridge, mantel, or wall as a reminder of Thanksgiving blessings.
Snoopy Place Card Holders
Designate seats with Snoopy place card holders made from peanut butter jars. It’s an inexpensive craft that also repurposes recyclable snoopy thanksgiving decorations items.
You will need:
- Clean peanut butter jars with lids
- Black and white paint
- Small paintbrush
- Printed Snoopy face template
- Glue
- Scrapbook paper, fabric, or tissue paper
- Place cards
Instructions:
- Remove any stickers from the jars and wash thoroughly.
- Paint the lids black and let dry completely. Use white paint to add Snoopy’s ears.
- Print out the Snoopy face template and glue to the front of the jar.
- Cut scrapbook paper, fabric, or tissue paper into 1 inch strips. Glue around the jar in a looping pattern.
- Once the glue dries, place cards with guest names between the jar lid and band.
- Set a personalized Snoopy holder at each place setting.
Snoopy Finger Puppets
Let kids reenact the first Thanksgiving with these simple pilgrim and Native American Snoopy finger puppets. They’re also fun toys for pretend play.
You will need:
- Printed puppet templates
- Cardstock or construction paper
- Hole punch
- Glue or tape
- Scissors
- Markers, sequins, pom poms, etc. for decorating
Instructions:
- Print out the pilgrim Snoopy and Native American Snoopy templates on cardstock, enlarging to fill the page.
- Cut out both puppets. Cut a slot at the bottom of each to insert fingers.
- Decorate the puppets with markers, sequins, feathers, pom poms, etc. Add details like buckles on shoes.
- Optionally, laminate the puppets for durability.
- Put on a puppet show reenacting the first Thanksgiving meal with the pilgrim and Native American Snoopys.
“I’m a Little Turkey” Puppet
For a fun singing activity, have kids make “I’m a Little Turkey” puppets to sing the Snoopy-themed song to the tune of “I’m a Little Teapot.”
You will need:
- Construction paper or cardstock
- Printed turkey template
- Markers, crayons, glitter, etc.
- Craft sticks
- Scissors
- Glue
Instructions:
- Print out the turkey templates and cut out of construction paper.
- Decorate the turkey shapes with craft supplies. Add details like feathers, eyes, mouth, and Snoopy’s iconic feather.
- Glue a craft stick to the back of each turkey shape.
- Sing the song while moving the turkey puppets:
“I’m a little turkey short and fat Here are my feathers, here is my hat When I see Thanksgiving, hear me shout Gobble, gobble, gobble – watch me strut!”
Repeat, allowing each child to sing with their turkey puppet.
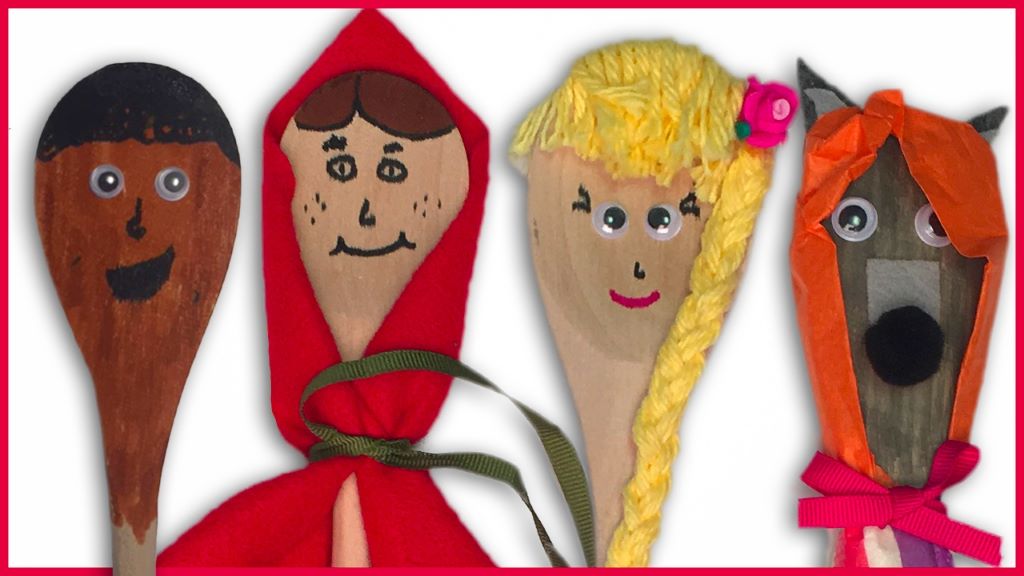
Wooden Spoon Snoopy Puppets
These Snoopy puppets are perfect for acting out the first Thanksgiving. Simple and fun to make, they also allow for open-ended, imaginative play.
You will need:
- Wooden spoons
- Acrylic or tempera paint
- Paintbrushes
- Printed Snoopy face templates
- Glue
- Scissors
- Markers for details
Instructions:
- Paint the back of the wooden spoons black and set aside to dry.
- Use white paint to add Snoopy’s iconic curled ears. Allow to dry fully.
- Glue the Snoopy face template onto the curved part of the spoon.
- Use markers to add details like rosy cheeks, eyelashes, and feathers.
- Once complete, little hands can use the puppets to role play the story of Thanksgiving.
Snoopy Hats
Instead of traditional paper hats, make adorable Snoopy hats for kids to wear on Thanksgiving. This no-sew craft is quick and easy.
You will need:
- White paper lunch bags
- Black construction paper
- Glue
- Scissors
- Optional: red pom poms or fabric scraps
Instructions:
- Cut off the bottom of the white paper bag and discard.
- About one third from the open end, create two holes for eyes. Cut the rest into a curved shape for Snoopy’s mouth.
- From black construction paper, cut out two large triangles for ears and a smaller triangle for the nose. Glue in place.
- Glue a red pom pom or fabric scrap on top for Snoopy’s feather.
- Try on your Snoopy hats for Thanksgiving dinner!
Melted Crayon Snoopy Art
For colorful turkey art, have kids draw Snoopy with old crayons and melt him into a festive design. Supervise closely as melting crayons can get hot.
You will need:
- White cardstock
- Old crayons with paper removed
- Oven
- Cookie sheet lined with foil
Instructions:
- Have kids draw a simple Snoopy outline on the cardstock with any colors.
- Place the artwork on a lined cookie sheet and put in a 175°F oven for 3-5 minutes until slightly melted.
- Remove with oven mitts and allow to cool before handling. The colors will bleed together.
- Outline again with black crayon to define Snoopy if needed.
- Draw a turkey body shape around Snoopy and add details like feathers.
Display the melted crayon art for colorful Thanksgiving decor!
Snoopy Footprint Wreath
Capture your little one’s footprints on a wreath that can be displayed year after year. It’s a perfect craft for babies’ first Thanksgiving.
You will need:
- Canvas wreath form
- Non-toxic paint pads or washable tempera paint
- Cardstock
- Scissors
- Glue
Instructions:
- Press your baby’s foot onto the paint pad or into tempera paint on a paper plate.
- Firmly stamp the foot onto cardstock to get a detailed impression. Repeat, making prints in different colors.
- Once dry, cut out the footprints. Glue in a wreath pattern around the canvas wreath form.
- You can add accents like turkey feathers or letter stickers spelling “Baby’s First Thanksgiving.”
- Hang on the door or wall to celebrate baby’s Thanksgiving holiday!
Handprint Tree Craft
This handprint craft makes for a sweet homemade Thanksgiving gift, while teaching kids to be grateful for nature’s beauty.
You will need:
- Construction paper or cardstock
- Green, brown, orange paint
- Markers, foam stickers, etc. for decorating
- Glue
Instructions:
- On brown paper, have your child paint the trunk and branches using their fingertips.
- For the leaves, press their hand into orange and green paint and print leaves on the branches.
- Once dry, add details like lines on the trunk or foam sticker apples. Write what your child is thankful for.
- Trim to make a rectangular card to give to grandparents or another loved one. Display on a mantel or fridge.
Thankful Turkey Mason Jar
This gratitude craft encourages kids to recognize blessings while making a nice Thanksgiving centerpiece. Customize your thankful turkey with unique feathers.
You will need:
- Wide-mouth mason jar
- Construction paper
- Scissors
- Glue stick
- Marker
Instructions:
- Cut out a turkey body, head, and wattle from brown construction paper and glue to the jar.
- Cut feather shapes from colored paper. Write what you’re thankful for on each.
- Glue the feathers in a fan around the jar to look like a tail.
- Draw on eyes, beak, and Snoopy’s red feather.
- Place on the table as a reminder to reflect on gratitude this season.
Handprint Thanksgiving Cards
Simple handprint cards make thoughtful Thanksgiving treats for neighbors, teachers, or loved ones. Kids will love seeing their turkey take shape.
You will need:
- Construction paper
- Scissors
- Glue stick
- Markers, wiggly eyes, pom poms, etc.
Instructions:
- On paper folded in half, help your child trace around their handprint for the turkey body.
- Cut it out and glue to the inside of the card.
- Trace their thumb for the head and glue in place.
- Decorate with markers, wiggly eyes, and other materials to finish your turkey.
- Write a thankful message inside and give to someone special!
Pom Pom Snoopy magnets
These fuzzy Snoopy magnets provide a creative way to display thankful messages, holiday cards, and artwork on the fridge.
You will need:
- Black, white and red pom poms
- Googly eyes
- Magnet strips
- Craft glue
Instructions:
- Glue a white pom to a larger black pom to form Snoopy’s head. Add eyes.
- Glue a smaller black pom to the white one for his snout.
- Glue a red pom above his eyes for the feather.
- Stick a magnet strip onto the back of the black pom pom.
- Kids can make a flock of Snoopy magnets to decorate the fridge with Thanksgiving art, schoolwork, and thank you notes.
Clothespin Turkey Decor
Handpainted clothespins make darling turkeys that can adorn wreaths, place settings, and more with simple supplies.
You will need:
- Clothespins
- Acrylic paint in orange, yellow, brown, red
- Googly eyes
- Hot glue gun
Instructions:
- Paint clothespin tops orange for the beak. Paint bottoms brown for the body.
- For the head, paint a wooden bead or small pom yellow. Add googly eyes. Glue to brown clothespin body.
- Use red paint to add Snoopy’s feather on the yellow head.
- Glue a red pom pom to the body for a wattle if desired.
- Clip onto wreaths, place cards, and other Thanksgiving decor!
Snoopy Banner
Show your Peanuts pride by hanging a Snoopy-themed banner on the mantel or entryway. You could also use it to decorate a Thanksgiving parade float!
You will need:
- Red, yellow, black paper or fabric
- Triangle template
- Scissors
- String, ribbon, or twine
- Tape or glue
Instructions:
- Print out the triangle template and cut from red, yellow, and black paper. Make several of each.
- On the black triangles, have kids draw Snoopy in different poses, like dancing, playing instruments, waving, etc.
- Tape or glue the triangles together in an alternating pattern onto your string or ribbon.
- Hang up your Thanksgiving Snoopy banner for a festive, Peanuts touch!
Toilet Paper Roll Snoopy
Don’t toss out your toilet paper tubes! Repurpose them into a Snoopy centerpiece kids will love making.
You will need:
- Toilet paper tube
- White and black paint
- Small paintbrush
- Black construction paper
- Scissors
- Glue stick
- Markers
Instructions
- Paint the toilet paper tube white and let dry fully.
- Paint on Snoopy’s black ears, leaving tips white.
- Cut a black nose and eyes from construction paper. Glue onto Snoopy’s face area.
- Use markers to add rosy cheeks, eyelashes, feather, etc.
- Cut a slit on the back so it stands up. Place on the dinner table!
Snoopy Footprints Walkway
Lead guests to your Thanksgiving feast with a walkway decorated with Snoopy footprints. This pathway craft can also surround table centerpieces.
You will need:
- White and black paint
- Cut-out footprints template
- Orange, yellow, or red paper
- Tape
Instructions:
- Cut out footprints from the template. Trace onto paper to make more.
- On a few, paint toes black for Snoopy’s feet.
- Tape the footprints to the floor, walls, or tabletop in a path.
- Add cute details like trailing feathers or signs with arrows pointing the way to dinner.
- Your guests will smile following the Snoopy footprints!
Thankful Thoughts Jar
Encourage gratitude all season long with this easy DIY gratitude jar. Kids can drop in notes with things they’re thankful for year-round.
You will need:
- Clean glass jar or container
- Printable “Thankful Thoughts” label
- Scissors
- Glue stick
- Notecards or paper
- Hole punch
- Ribbon, raffia or string
Instructions:
- Clean and dry the glass jar thoroughly.
- Print and cut out the “Thankful Thoughts” label. Glue onto the jar.
- Hole punch cards or paper to fit the jar opening.
- Place note cards and a pen near the jar. Prompt kids to write down things they’re grateful for.
- Let them roll up notes and add them to the Thankful Thoughts Jar. The whole family can contribute!
- Tie ribbon around the jar neck for decoration and easy removal of notes.
- Revisit notes Thanksgiving morning or all season long for grateful reminders.
Cupcake Liner Turkeys
Turn colorful cupcake liners into mini turkey characters for place cards, centerpieces, and Thanksgiving decor. Super simple for kids to make.
You will need:
- Cupcake liners
- Googly eyes
- Orange pom poms or paper
- Glue stick or tape
Instructions:
- Take one cupcake liner and glue on googly eyes for the turkey’s face.
- Glue or tape an orange pom pom underneath for a beak.
- Take a second liner and glue to the back as the turkey tail.
- Write names on the turkeys to use for place cards or table decor.
- Make a flock of turkeys in fall shades to create a festive Thanksgiving scene!
Fun Foam Stickers
Let kids customize their Thanksgiving with homemade Snoopy stickers. They’ll have a blast creating designs to decorate dishes, placemats and more.
You will need:
- Fun foam/craft foam sheets
- Scissors
- Hole punch
- ribbon, string, or twine
Instructions:
- From foam sheets, cut out Snoopy heads, Woodstock characters, footballs, bones, hearts, stars or other shapes.
- Use a hole punch to cut out eyes, mouth, etc. Have kids decorate with markers.
- Punch a hole and add ribbon to make name tags or place cards.
- Or, peel off sticker backing to use designs as decorations on cards, placemats, plates, etc.
- Let kids make enough foam stickers for the whole Thanksgiving table!

Decorative Napkin Rings
Dress up your holiday table with Snoopy napkin rings. Kids will have fun personalizing each family member’s ring.
You will need:
- Construction paper
- Scissors
- Marker
- Glue stick or tape
- Hole punch
Instructions
- Cut strips from construction paper. Wrap around napkin and glue ends together into rings.
- Cut out heads from white paper. Add Snoopy features with marker.
- Glue Snoopy heads to rings. Write names below.
- Punch holes around the rings and tie ribbon through for extra flair.
- Slide personalized Snoopy napkin rings over rolled napkins at each place setting!
Wooden Spoon Puppet Show
Let kids retell the first Thanksgiving with these simple DIY puppets. Crafting the scene and characters boosts story comprehension.
You will need:
- Wooden spoons
- Craft paint
- Glue
- Markers
- Cardstock
- Craft sticks
Instructions:
- Paint wooden spoon heads brown, tan, black, etc. and let dry.
- Glue on facial features like eyes nose. Use markers for details like hair, mouth, clothes.
- Cut feather shapes from cardstock. Glue to heads for pilgrim hats.
- Glue craft stick handles onto spoon backs.
- Create a scene backdrop with trees, ships, food, etc.
- Reenact the first Thanksgiving with these handmade character puppets!
Handprint Wreath
This DIY wreath shows off your child’s growth with handprint “feathers” from each year. A special keepsake for every Thanksgiving.
You will need:
- Sturdy paper plate or cardboard
- Scissors
- Craft paint
- Glue
- Hole punch
- Ribbon
Instructions:
- Cut the paper plate into a ring, cutting out the center. This is your wreath form.
- Paint your child’s palm with brown craft paint. Firmly press onto cardstock to imprint.
- Cut out the prints into feather shapes. Write your child’s age on each feather.
- Glue the handprint feathers onto the wreath form.
- Punch holes around the wreath edge. String ribbon through to hang up.
- Add new feathers each Thanksgiving to watch your child grow!
Clothespin Turkeys
Decorate your Thanksgiving table or display shelf with a flock of clothespin turkeys. Easy for even young kids to help make.
You will need:
- Clothespins
- Construction paper
- Googly eyes
- Glue
- Markers
Instructions:
- Glue clothespin tops to bottom ends to form the turkey body.
- Cut and glue on construction paper wings, feathers, and snood.
- Add googly eyes and draw on beaks with markers.
- Write name tags on the wings to use as place cards.
- Arrange your clothespin turkeys on napkins, plates, wreaths or garlands to decorate for Thanksgiving.
Turkey Track Treats
Leave a silly Thanksgiving surprise with Oreo turkey tracks! Make a yummy edible craft to delight kids.
You will need:
- Oreo cookies
- White icing
- Toothpicks
Instructions:
- Twist Oreos apart and scrape off the creme.
- On a plate, place icing dots for glue. Press three Oreos together for the turkey body.
- Use icing to attach candy corn for feet and toothpicks for legs.
- Add a feather by piping icing stripes onto a pretzel stick.
- Place turkey tracks on napkins or use to decorate cookies and cakes!
Fingerprint Pumpkin Pie Cards
Make Thanksgiving cards with clever fingerprint pumpkins just for fun! Quick, easy craft to include kids.
You will need:
- Orange and brown paint
- White cardstock
- Green marker
- Googly eyes
- Glue
Instructions:
- Press finger in orange paint then onto cardstock to print pumpkin shape.
- Add brown stem with marker. Add googly eyes.
- Press thumb in brown paint for pumpkin top texture.
- Write “You’re the pumpkin in my pie!” message inside card.
- Kids can craft cards for friends and family to send Thanksgiving cheers!
Thankful Bookmarks
Let kids list what they’re grateful for on these DIY bookmarks. Quick craft doubles as a Thanksgiving keepsake.
You will need:
- Construction paper
- Scissors
- Markers, crayons
- Hole punch
- Ribbon, yarn or string
Instructions:
- Cut construction paper into bookmark sized strips.
- On one side have kids decorate with stickers, stampers, etc.
- On the back, write or draw things you are thankful for.
- Punch a hole at the top and tie on ribbon for hanging.
- Send to loved ones as holiday gifts or use to mark pages in favorite books!
Handprint Wreaths
Hang a seasonal wreath decorated with your child’s handprints for Thanksgiving. Save the craft to watch your child grow!
You will need:
- Paper plate
- Scissors
- Craft paint
- Cardstock
- Glue stick
- Ribbon
Instructions:
- Cut out the center of a paper plate, leaving a wreath ring.
- Paint child’s hand with brown or orange paint and press onto cardstock to imprint.
- Cut out the prints into leaf shapes. Write your child’s age on leaves.
- Glue the handprint leaves onto the wreath form.
- Punch holes around the ring and string ribbon through to hang.
- Create new handprint leaves each year for a lasting Thanksgiving craft!
Yarn Wrapped Wreath
This easy yarn wreath makes for a fun craft to decorate your Thanksgiving front door or tablescape.
You will need:
- Paper plate
- Scissors
- Yarn, twine or string
- Hot glue gun
- Decorative accents: ribbon, sticks, leaves, berries
Instructions:
- Cut out the center of a paper plate so you have a ring.
- Wrap yarn around the wreath form, securing ends with hot glue.
- Glue and tuck in decorations like ribbon, sticks, leaves, flowers, berries etc. as you wrap the yarn.
- Add a festive bow at the bottom if desired.
- Hang on the front door or display on a table to add rustic charm to your Thanksgiving decor.
Acorn Place Card Holders
Welcome guests to your Thanksgiving feast with these acorn place card holders. Simple kid-friendly craft for your autumn table.
You will need:
- Acorn shapes template
- Brown, orange and yellow paint
- Foam brush
- Hot glue
- Small terra cotta pots
- Mini moss or flowers (optional)
- Place cards
Instructions:
- Cut out acorn shapes from the template. Paint tops orange and bottoms brown.
- Hot glue the acorns onto terra cotta pots upside down.
- Optional: Add moss or small flowers into pot cavities for decoration.
- Write guest names onto place cards and slide into acorns to mark seating.
- Arrange on your autumn tablescape for a nature-inspired Thanksgiving!
Kid DIY: Felt Turkey Bookmarks
Encourage reading at Thanksgiving with felt turkey bookmarks. Fun craft for preschoolers and kindergarteners to make!
You will need:
- Felt or felt sheets
- Googly eyes
- Craft glue
- Fall rub-on shapes or stickers (optional)
- Scissors (for adult use)
Instructions:
- Cut thick shapes from felt in brown, orange, red, yellow for turkey features.
- Allow child to assemble features into a turkey using glue.
- Add googly eyes, foam stickers or rub-ons for decoration.
- Laminate bookmarks or cover in clear contact paper for durability.
- Have kids write their names on the back and keep their turkeys with library books or bedtime stories!
Paint Chip Turkey Cards
Repurpose paint chips into cute mini turkeys for Thanksgiving cards. Fun project for young crafters.
You will need:
- Paint chips in fall colors
- Googly eyes
- Orange pom pom or foil
- Glue dot
Instructions:
- Fold an orange or brown paint chip in half for the body.
- Glue on googly eyes. Use a pom pom or foiled candy for the beak.
- Fan out a row of multicolor chips for the feathers.
- Fold a card in half and glue the turkey inside.
- Write a Thanksgiving greeting! Deliver to family or friends.
Recycled Crayon Molds
Don’t throw out broken crayons! Refashion the stubs into new holiday shapes using silicone molds.
You will need:
- Broken crayon bits
- Silicone molds: turkeys, leaves, acorns etc.
- Mini cupcake liners
Instructions:
- Sort and peel crayon pieces, separating by color family.
- Place crayon chunks into silicone mold cavities.
- Bake molds on a lined cookie sheet at 200°F for 5-10 minutes until melted.
- Let cool, then pop out new crayon shapes!
- Arrange in cupcake liners to gift to young artists or use for place cards.
Fingerprint Table Runner
Make handprint turkeys for a DIY table runner. A fun craft to create with kids for Thanksgiving.
You will need:
- White paper or cloth
- Washable paint
- Foam brush
- Scissors
- Tape
Instructions:
- Have kids press finger in brown paint then print onto paper to make a row of turkeys.
- Cut out strips of paper, alternating prints with blank sections.
- Tape strips together into a runner and trim to fit your table.
- Set out for Thanksgiving dinner! The homemade touch will be a conversation piece.
Pom Pom Sprigs
Adorn wreaths and tablescapes with pom pom sprigs for texture and color. Fun project to make with the kids.
You will need:
- Green chenille stems
- Large and mini craft pom poms
- Floral wire
- Scissors
- Hot glue gun
Instructions:
- Twist floral wire around chenille stems for branch shapes.
- Arrange mini pom poms into sprigs or berries using hot glue.
- Twist sprigs onto the branches. Use large pom poms for leaf accents.
- Trim stems and fluff out designs.
- Insert into floral foam or tuck into wreaths, centerpieces and garlands.
Apple Pie Air Fresheners
Fill your home with the cozy scents of autumn using this super simple kid craft.
You will need:
- Red, yellow and brown felt
- Spices: cinnamon sticks, whole cloves, nutmeg
- Craft glue
- Hole punch
- String, ribbon or twine
Instructions:
- Cut apple shapes from felt in alternating colors.
- Apply glue and sprinkle with spices for “filling”.
- Stack apples slices into a pie shape.
- Punch a hole at the top and string through ribbon to hang.
- Arrange felt pies out of reach to softly scent the home for Thanksgiving!
Acorn Place Card Holders
Welcome guests to your snoopy Thanksgiving decorations with these nature-inspired place card holders. Easy craft for kids.
You will need:
- Acorn printable template
- Brown and orange paint
- Hot glue gun
- Mini terra cotta pots
- Place cards
- Moss or leaves (optional)
Instructions:
- Print and cut out acorn templates. Paint caps orange and bases brown.
- Hot glue acorns to terra cotta pots upside down.
- Add bits of moss or leaves inside pots if desired.
- Write out guest names on place cards and tuck inside acorns.
- Arrange on your Thanksgiving table for an autumnal flair!
FAQs
How long do I cook a turkey for Thanksgiving?
Cook times can vary greatly depending on the size of your turkey and oven temperature. A general guideline is 15-18 minutes per pound at 350°F. Use a meat thermometer to ensure the thighs reach 165°F. Let rest 30 minutes before carving.
When should I thaw a frozen turkey for Thanksgiving?
Allow 24 hours of thawing time per 4-5 pounds. Keep the turkey in its original wrapping and place on a tray in the refrigerator. A 16 lb turkey would need around 4 days to fully thaw.
How much turkey should I buy per person?
Plan on about 1 pound of turkey per person. Leftovers are great, but you don’t want to overbuy. Get a 12-15 lb turkey for 10-15 people. Add extra sides to balance the meal.
What’s the best way to roast a turkey?
Place turkey on a rack in a roasting pan, breast side up. Rub skin with oil or butter and seasonings. Tent with foil until last hour. Baste occasionally as it roasts. Cook to 165°F in thickest part. Let rest before carving.
Can I stuff my turkey in advance?
For food safety, it’s best to cook stuffing separately from the turkey. If you do stuff it, only do so right before roasting. Use a food thermometer to ensure the center of the stuffing reaches 165°F.
Summary
Thanksgiving is about more than just the food – it’s about time spent with loved ones. Getting kids involved in making DIY snoopy thanksgiving decorations and crafts for the holiday not only creates festive homemade touches, but also makes for meaningful family bonding. The most popular Christmas decoration often extends beyond ornaments and twinkling lights; simple handprint keepsakes, paper craft turkeys, crayon leaf art, and more provide easy ways for little ones to contribute, and displaying kids’ Snoopy-themed creations infuses holiday traditions with cherished memories.