Having a proper backdrop can make a huge difference when taking photos. Whether you want product shots for your online store or fun family photos, a backdrop helps provide a clean, consistent background that makes the main subject really stand out. But backdrops aren’t helpful if you don’t have a good way to hold them up! That’s where a backdrop stand comes in. A stand for pictures does exactly what it sounds like – it’s a stand specifically designed to mount and hold backdrops in place for photographing subjects in front. Backdrop stands come in various sizes and configurations for professional studios, from small tabletop models to large heavy-duty stands. But you can also easily make your own using inexpensive supplies from a hardware or home improvement store.
Constructing Stand for Pictures is a Simple
DIY backdrop stand for pictures is a beginner woodworking project anyone can tackle in an afternoon. Having your own homemade photo backdrop stand allows you to customize the size and adjust the height as needed to fit your space and subjects. The ability to break it down for storage or transport also makes a world of difference versus bulky fixed studio stands.
So if you’re eager for a photography upgrade that won’t break the bank, look no further! Here’s a step-by-step guide to making your own backdrop stand for pictures.
Choosing Backdrop Stand Materials
This project only requires basic tools and materials easily purchased at your local hardware store or lumberyard. The main components are:
Wood boards – Select lightweight straight boards about 1×3″ or 1×4″. Pine boards are inexpensive and work perfectly. You’ll need boards cut to various lengths – the number and size depend on the backdrop size you want, but between 6 to 9 boards total usually works for standard backdrops.
PVC pipe – At least 6 feet length of 1.5″ diameter PVC works well for most backdrop stands. Make sure it’s Schedule 40 for durability.
Corner braces – These triangle metal braces reinforce the joints between wood boards for added stability. Get at least 8 small corner braces.
Backdrop support hooks – Purchasing large backdrop hooks made specifically for mounting backdrops makes setup easier. Get a set of at least 4 hooks.
Nuts, bolts, screws – Make sure to get the appropriate sizes to go with your corner braces and backdrop hooks. Bring the supplies with you to match up sizes.
Sandpaper & paint/stain (optional) – Making the backdrop stand look nice is completely optional! But sanding and staining or painting the wood can help it last longer and match your space better.
That covers all the key materials you’ll need. Keep reading for how to put it all together into a custom photography backdrop stand in simple steps.
Building the Base Frame
The first step is constructing the base frame that will support the vertical legs of the backdrop stand. This base needs to be nice and wide to hold the backdrop vertically and prevent tipping. Here’s how to make it:
- Take two of your 1×4″ pine boards and have the hardware store cut them to equal lengths of at least 40 inches. These will form the base.
- Sand down any splinters or rough edges on your base boards if desired. Rounding the corners slightly makes it safer to have around photographic equipment.
- Stain, paint or finish your base boards if desired. Allow time for drying completely before the next step.
- Place the boards parallel, 40 inches or so apart. Position the corner braces on each end, using included hardware to bolt into place tightly. The triangle braces should measure at least 6” on each side.
The sturdy wide base frame is complete! Now it’s time to add the vertical support legs.
Adding the Vertical Legs
With the base frame laid out horizontally, measure and mark 17 inch intervals across the width of the frame. These marks denote where you’ll attach vertical support legs. Here’s how:
- Take two more 1×4″ boards and have them each cut to 48 inches long. These form the first vertical leg pieces.
- Line up the leg boards above the 17 inch marks from opposite corners of the base frame. Use corner braces to bolt each vertical board in place at the marks. The leg boards should form an inverted “V” shape above the base frame.
- For stability, put corner braces on BOTH sides of each leg board attaching to the base frame.
- Repeat steps 1-3 to install a second set of vertical leg boards along the next set of 17 inch marks. Space both vertical leg pairs equally across the width of the base frame.
So far all upright components attach only to the base frame. Next we’ll add horizontal crossbars between the legs for hanging backdrops.
Installing the Crossbars
The crossbars bridge the gap between the vertical leg pieces, providing attachment points for the backdrop hooks. Follow these instructions:
- Take two more 1×4″ boards, cut to equal lengths matching the width between the TWO sets of vertical legs. These form the first crossbar.
- Position the new crossbar horizontally between the vertical legs, about 15 inches above the base frame.
- Use corner braces on each side to bolt the crossbar securely between the two sets of legs.
- Repeat steps 1-3, adding a second crossbar about 32 inches higher than the first crossbar. Space crossbars to leave room in between for backdrops.
- For extra stability, add corner brace reinforcements that run diagonally from the vertical legs UP to the crossbars. This braces the legs further and prevents swaying.
The wooden framework is complete! Next we’ll add PVC pipes across the top for placing backdrop hooks over.
Adding the PVC Backdrop Support
- Measure the distance between the TWO sets of vertical legs at the TOP of the stand frame, above the highest crossbar.
- Have your PVC pipe cut to this length. It will span between both leg pairs along the very top of the frame.
- Place the cut PVC pipe over the stand frame, centered above the crossbars. Allow equal overhang on the front and back sides.
- Use small zip ties, rope orcustom hooks to secure the PVC pipe in place across the very top of both vertical leg sets. The pipe should now remain firmly in place horizontally.
- Put your backdrop support hooks over the PVC on both sides. Space hooks evenly to match the backdrop width. Leave a few inches overlap on each side.
There we have it – a complete wooden photo backdrop stand! Pop your backdrops on using the hooks and get ready to start taking some great pictures!
Optional: Weights for Stability If you notice some wobbling in your backdrop stand, try adding simple weights to the base for more stability. Here are ways to weigh it down:
- Sandbags – Fill heavy duty sandbags with sand and position over each of the base frame legs
- Bricks – Place standard bricks on their sides over the frame legs
- Dumbbells – Medium sized dumbbell weights placed across the bottom work perfectly
Experiment to see how much additional weight best secures your backdrop stand while shooting. With a wide enough base and weights over the legs, it should now stand nice and stable for your photography sessions!
Setting Up Your Backdrops
Now for the fun part – it’s time to put up backdrops and start using your new photography backdrop stand!
If you don’t have backdrop material yet, all types of fabric make great starter backdrops. Solid color sheets and linens found cheaply at thrift stores or department stores like Target work perfectly.
Here are tips for attaching backdrops:
- Drape your backdrop fabric over the PVC pipe across the very top of the stand frame. Allow enough extra length to puddle slightly on the floor for a nice flow.
- Secure one side of the backdrop using two of the backdrop hooks attached to the vertical legs. Stretch the backdrop evenly across the hooks on both sides.
- Use clamps to temporarily secure the bottom edges of the backdrop to the base frame legs. Try C-clamps, binder clips or clothespins. This prevents the wind or fans from blowing the backdrop around.
- For extra stability, put tape, velcro strips, ties or more hooks along the sides of the fabric connecting to the stand legs. Secure the backdrop further so it stays perfectly centered and doesn’t slip.
- Check for wrinkles and adjust the backdrop material as needed until smooth and evenly positioned.
There you have it – a crisp smooth photography backdrop mounted and ready for photos! Snap away and adjust backgrounds out quickly and easily as needed.

Disassembling & Storing Your Backdrop Stand
One advantage of a homemade backdrop stand is having the ability to break it down for storage or transport. Follow these tips for easy takedown and storage:
- Start by removing your backdrop from the PVC pipe and hooks. Neatly fold or roll up the backdrop if you’ll reuse soon.
- Remove corner braces, screws, bolts and ties beginning at the top with the PVC pipe. Keep all hardware pieces together (zip bags work great).
- Once the frame is fully detached, break down wood pieces starting with the vertical legs and crossbars. Stack evenly together.
- Finally unscrew the corner braces to detach your base frame pieces. Disassemble in reverse order from assembly.
- Secure all components together – wood boards, PVC pipe, corner braces and hooks using rope, velcro straps or packing tape.
- Store your backdrop stand supplies together in a dry covered spot until your next photoshoot or backyard event! Add a label with assembly notes or grab your DIY guide again later.
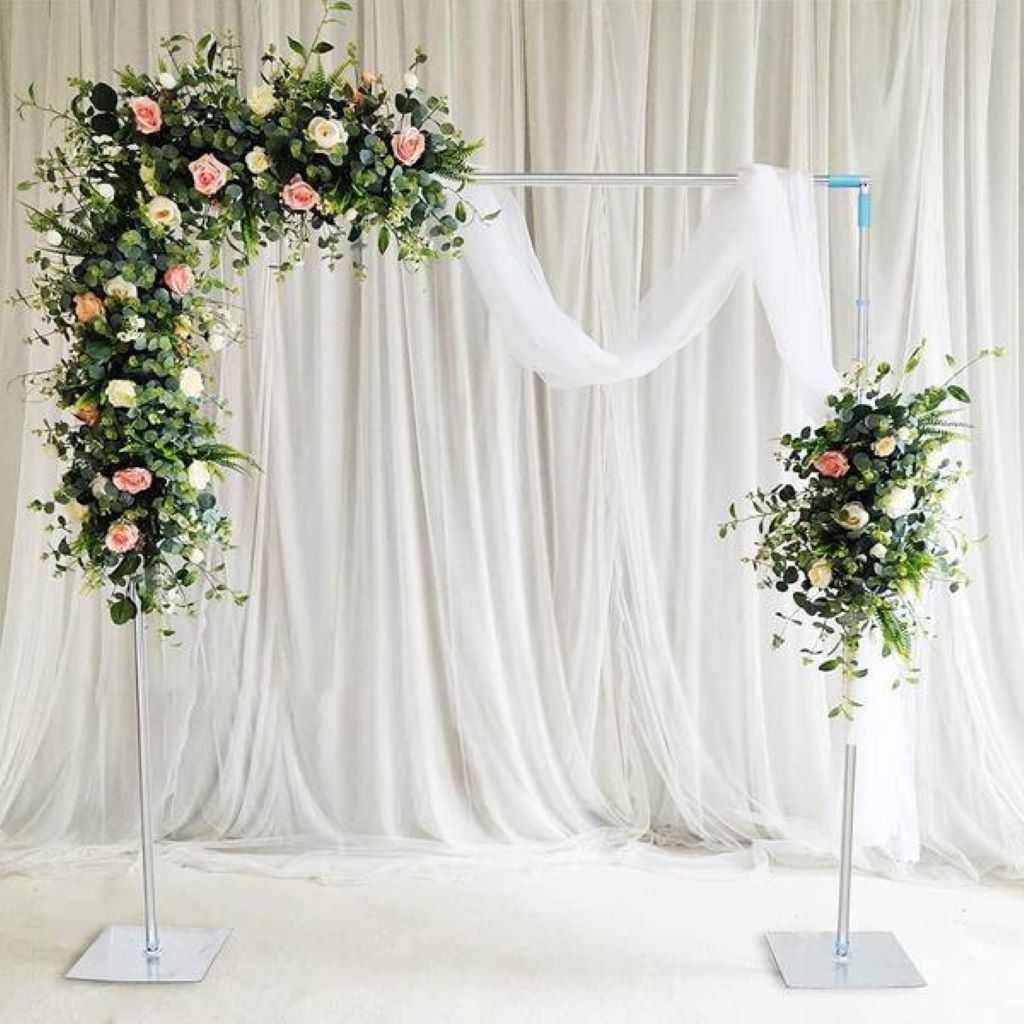
Customizing Your Backdrop Stand
Now that you know the basics of constructing a photography backdrop stand, feel free to customize your own design!
Play around with various wood tones and paint colors that fit your style. Add decorative touches like your logo or brand name stenciled onto the horizontal crossbars for a personalized look.
Get creative remixing the simple blueprint by:
- Making a taller/shorter stand for different heights
- Using metal pipes or spindles instead of wood legs
- Building a mounted swivel base for spinning around models
- Creating folded side “wings” that extend backdrop width
- Experimenting with weatherproof materials for outdoor events
The options are endless once you understand the necessary framework and support structure. Building your own photography backdrop stand saves money and lets creativity shine!
Troubleshooting Backdrop Stand Issues
If you run into any problems with your DIY photography backdrop stand try the following troubleshooting tips:
Stand shakes/wobbles:
- Check all bolts/screws are tightened securely
- Add sandbags or other weights to bottom legs
- Ensure legs are vertical and firmly braced
Backdrop sags unevenly:
- Distribute weight evenly using secure ties at multiple points
- Make stand height matches backdrop size
- Ensure top of backdrop aligned correctly
Hardware comes loose over time:
- Consider longer screws/bolts if coming unattached
- Try nuts and lock washers to prevent loosening
- Check leg joints for wood cracks/damage
Stand leans sideways:
- Confirm base frame is straight and square
- Balance weight and stand centrally on legs
- Reinforce wider base and diagonal leg bracing
PVC pipe bends too much:
- Use thicker, sturdier pipe (ex. 1.5” sched 40)
- Add vertical endcaps into pipe for rigidity
- Shorten pipe length/reduce load if bowing too much
Repair wobbles or malfunctions right away. Careful backdrops stand construction and occasional maintenance helps maximize lifespan!
FAQs
How much weight can my backdrop stand safely hold?
The maximum weight depends on materials and construction, but a typical DIY wood frame stand can likely handle 30-50 lbs suspended from sturdy mounted crossbars. Heavier weights risk eventual bowing, cracking and toppling safety hazards. Scale stand height/width appropriately for needed backdrop size instead of extreme weight.
What are better alternatives to wood for my backdrop frame?
While wood boards and PVC pipes work great, wrought iron piping has become a popular alternative material for increased strength on custom backdrop stands. Aluminum poles and clamps also allow heightened adjustable flexibility. And extremely durable steel studs withstand over 150 lbs in some cases! Weight capacity comes down to wall thickness of materials used.
Should I make my own backdrop material?
Absolutely! While buying photo backdrops can get very expensive, creating your own custom prints is much cheaper (and fun!). Turn any artwork, digital graphic, photo or colorful pattern into a unique photography backdrop. Use an online service or large format printer to print artwork onto common backdrop materials like muslin, canvas or vinyl. Then stretch onto your custom frame creation.
What’s the best way to transport my backdrop stand?
The beauty of a DIY construction backdrop stand is convenience breaking down pieces for portability and storage when not set up. It’s wise to pack components very carefully to prevent scratches, dents and bending during transport. Wrap smaller items like corner braces in packing paper or small boxes first. Then pack neatly and securely into a large padded case, crate or bin for easy moving without danger of pieces coming loose.
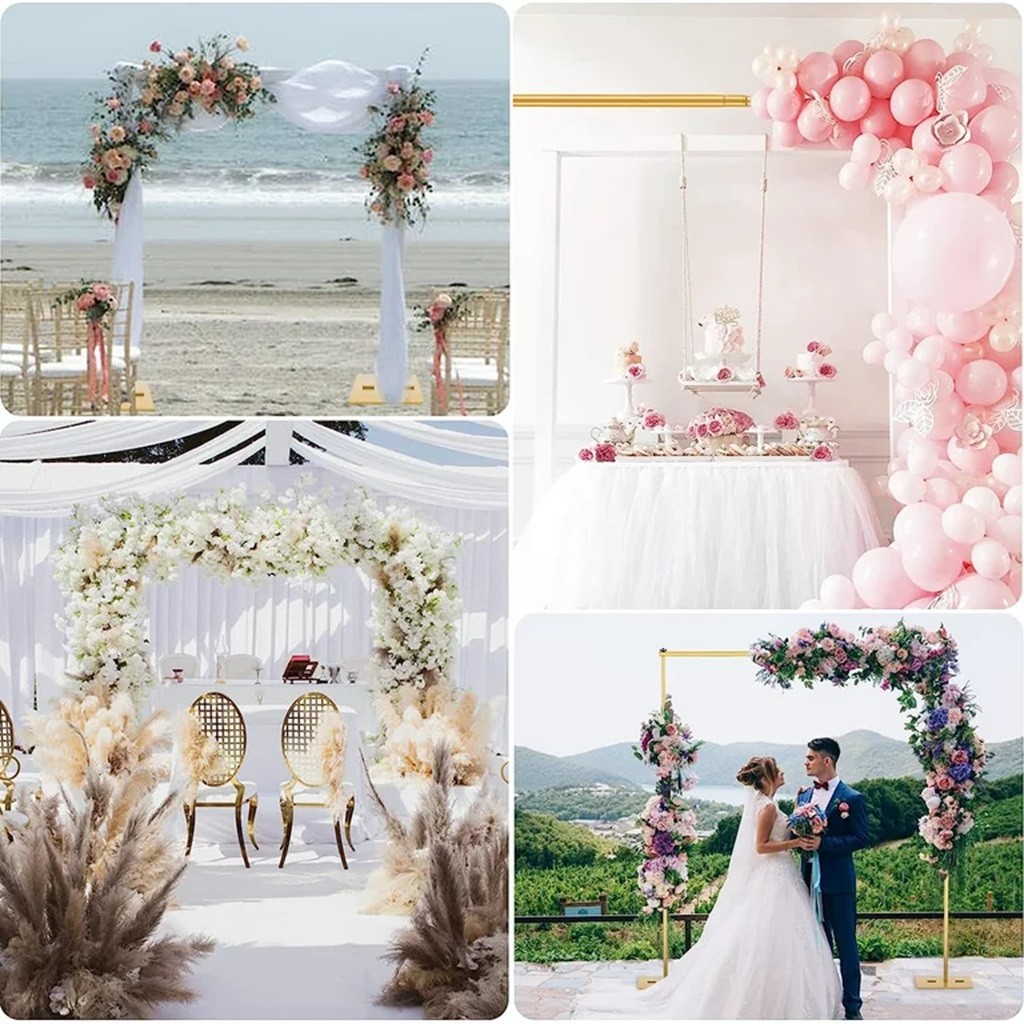
Can I use my backdrop stand outside too?
With weather treated lumber or weather resistant metals like aluminum in the frame, backdrop stands can absolutely be utilized outdoors! Just use common sense securing it from wind gusts. Weigh down stand legs firmly to ground and lower overall height for stability. If using fabric backdrops, select materials specifically made for outdoor use that can withstand sun and moisture without degrading quickly. And take windy weather into account directing subjects and lighting equipment.
Last Thoughts
I hope this DIY guide on the stand for pictures gives you a great starting point for constructing your own photography backdrop stand customized perfectly to your space and needs.
The advantage of learning how to build a backdrop stand on your own instead of purchasing readymade kits is getting that completely tailored functionality – match it to any room layout, dial in specific heights required, pick your favorite materials and paint colors, accessorize functionality like spinning swivel attachments and so much more.
Plus, you gain invaluable beginner knowledge about structural construction planning and hands-on building techniques that are useful for endless other projects around the home and workshop.
So don’t be intimidated about where to start step-by-step to make this beneficial photography tool a reality with basic tools and widely available construction lumber.
Use the helpful directions and tips above to construct a backdrop stand that fits your photography style. Get creative remixing the template as you hone your own carpentry skills with the Arch Backdrop Stand, and watch your photography magically improve; this simple backdrop upgrade not only enhances your craftsmanship but also makes subjects pop beautifully against an elegant, consistent background, offering endless creative possibilities.