
Converting a room into a garage is a great way to add extra storage space and a designated area to work on DIY projects. This option is more affordable than building a full garage addition while still adding valuable square footage to your home. With careful planning and hard work, you can create customized garage storage in the comfort of your own home. We’ll guide you through all the essential steps for converting a room into a garage. Let’s begin!
Figuring Out Exactly What You Want
Before swinging a sledgehammer, figure out precisely how you want to use the space. Will it mainly be for storage or do you plan on using it as a true workshop? These key usage factors guide critical decisions from layout to power requirements. Grab a pen and paper to jot down garage must-haves.
If gear storage ranks high on your list, include specifications of your largest items. You’ll need to measure snow blowers, lawnmowers, ladders, bikes and any other bulky goods to confirm the layout allows everything to fit. Don’t forget vertical storage, too – note ceiling height limitations for shelving systems or tall cabinets. If you own a truck, measure its length, width and height to guarantee you can safely drive into the converted garage when necessary.
For workshops, think about what types of tools and projects you’ll work on. Will you have space for multiple worktables or workbenches? Can you fit sizeable equipment like table saws or welding machinery? Make sure to consider necessary wall space to hang frequently used tools within reach. Do you need big open floor space to comfortably complete DIY builds?
Last but not least, factor in power needs too. Will basic 110-120 volt outlets provide sufficient juice? Or is 220-240 volt wiring required to run industrial level machinery? Knowing required volts and amps prevents getting stuck without enough electrical capacity halfway through a future renovation.
The more clearly you define your garage goals upfront, the better the end result functions for your lifestyle. With a strong vision committed to paper, you can confidently start clearing out the old room to begin its exciting transformation.
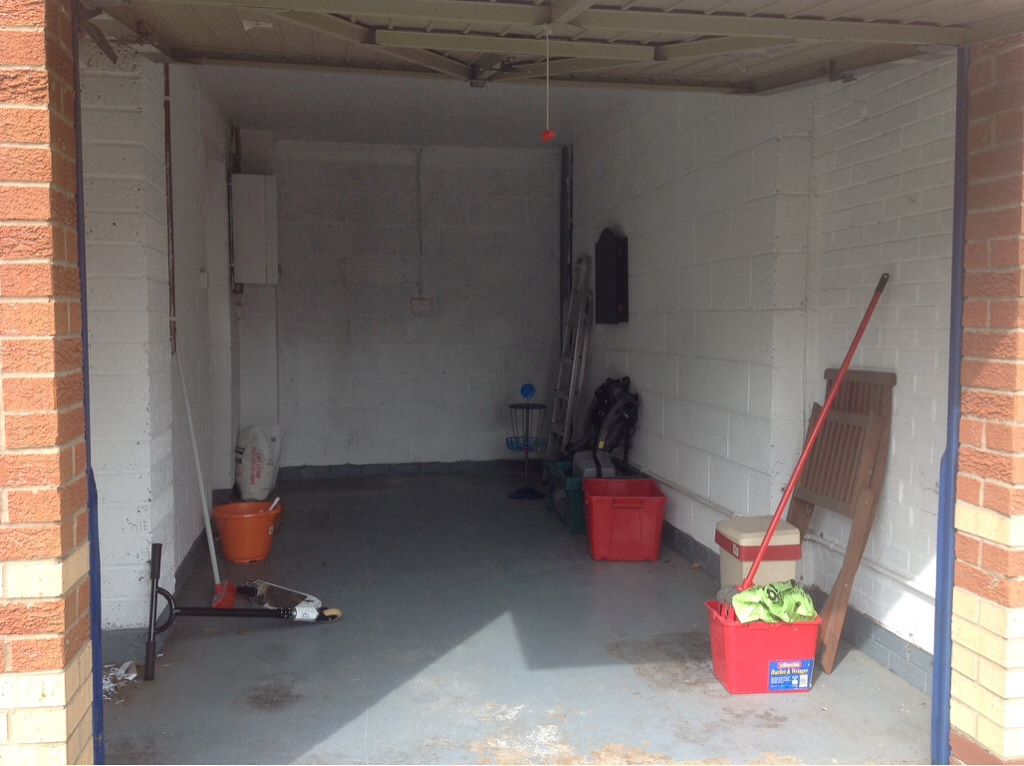
Emptying Out The Room
Before construction kicks off, completely clear all contents from the designated garage room. Removing everything gives you a blank canvas, making it faster to demolish existing infrastructure and build up the new layout. Recruit a few friends to expedite this potentially tedious step – many hands make light work!
Start by taking out all small items, furniture and decor from the room so vertical surfaces are as empty as possible. Evaluating an empty room helps you identify potential challenges or opportunities too. Next, carefully take down hanging light fixtures, mirrors or other wall-mounted items. Patch and sand any screw holes or nail divots until walls are smooth.
If the room has carpeting, remove it in its entirety after clearing furniture. Roll it up neatly and transport it outside where it’s out of the way. Take time scraping up carpet tacks, staples and any stubborn carpet padding stuck to the subfloor using a flat bar scraper or chisel set. Finish by thoroughly sweeping then vacuuming the floor so no debris gets ground in during upcoming demo work.
For tile, vinyl or laminate flooring, decide if you want to demo it now or later when sinking the new concrete slab floor. If inspections uncover asbestos vinyl tiles or glue, leave removal to hazardous waste professionals. Their expertise eliminates health risks during the delicate asbestos abatement process.
Building A Weatherproof Shell
One of the first priorities in converting any indoor room into a garage includes weatherproofing walls, ceilings, and floors. Unlike living spaces, garages endure greater temperature fluctuations from seasons changing outside. Moisture can also penetrate more easily without preventative measures. Let’s review how to lock out the elements so belongings stay protected year-round.
It all begins at the foundation level. Adding a concrete floor gets rid of dusty carpet, providing a durable, sealed surface able to withstand vehicle traffic. We’ll dig deeper into flooring options shortly. For now, the focus remains on the room’s shell.
In most cases, existing exterior walls have sufficient insulation to handle weather swings after removing the gypsum board. However, adding extra insulation provides supplemental protection from the cold. Use unfaced fiberglass batts or rigid foam boards to bring exterior walls up to code (R-13 minimum). Use expanding spray foam around irregular voids, too.
For interior walls and ceilings adjoining living spaces, soundproofing and fireproofing also jump in importance for safety. Here, staggered stud walls with multiple layers of drywall deliver increased damping and fire ratings. Staggered stud construction sandwiches an inner drywall layer between studs so no fasteners penetrate both sides. This primes walls for layers of fireproofing and sound-deafening insulation inside.
On the garage side
Secure moisture-resistant drywall or hardy backer board. Their durable surfaces stand up well to incidental scrapes from moving gear around while limiting moisture absorption. Greenboard drywall works, too. To finish, apply garage-grade paint containing antimicrobial agents to inhibit mold growth.
Now, let’s discuss the role ceilings play in weatherproofing your new garage. Like walls, most ceilings have some insulation installed, although levels usually fall short of current energy codes. Bringing density up to R-30 by blowing cellulose or spraying foam enhances efficiency while reducing sound transmission overhead. It also curbs expensive ice damming by limiting heat escape through the roof.
Don’t forget about adding a new weather-sealed access door, too! We’ll dig into specialty garage door specifics shortly. But for now, understanding this weatherproofing portal remains crucial, keeping outside environments outside once shut. Options like insulated steel doors prevent temperature exchange and condensation build-up indoors during hours.
Putting in the initial effort, weatherproofing all surfaces transforms what was once a basic interior room into a comfortable, conditioned garage. Now you can shift focus towards more exciting steps like laying durable new flooring able to withstand cars and trucks!
Pouring A Fresh Concrete Slab Garage Floor
One of the most immediately satisfying steps in converting a room into a garage includes tearing up old flooring to pour fresh concrete. Nothing screams a durable workshop quite like a professional-grade concrete slab! Laying around 4 inches of reinforced concrete creates an incredibly strong, long-lasting floor impervious to automotive fluids. It also facilitates welding, painting and other messy garage activities without worry of permanent damage too. Let’s look at the concrete pouring process from start to finish.
To begin, excavate down to expose the room’s footprint entirely. Remove existing flooring, like carpeting or tile, until you hit the gravel base below any subfloor. Dig this layer out as well until reaching undisturbed soil a total 6 to 8 inches below the room’s elevation. This depth accommodates a thick gravel base topped by 4 inches of high-strength concrete for the typical garage floor.
With the cavity excavated, filter any rubble or debris to create an even base. Compact down with rented equipment so soil firms up enough for gravel installation. Next, haul in drainage gravel, typically 0.5 to 1 inch diameter stones. Shovel and rake smoothly, keeping the surface totally flat. Recheck elevation height to confirm the required depth for your concrete slab.
Call The Concrete Truck
But before the mixer arrives, set up heavy wire mesh over top of the perfectly prepped gravel base. The grid reinforces finished concrete, adding tensile strength to the compression might of concrete. It also prevents cracking by bridging slab segments together so they move as one unit. Have rebar stands, 2×4 studs and other slab bolstering supplies staged nearby too. Feel free to embed conduit runs if planning in-floor radiant heating as well.
As the concrete truck backs into position, guide them along as operators leverage a chute to evenly disperse wet concrete over your mesh-reinforced gravel bed. Use a long straight board (screed) to evenly spread concrete, forcing it into all edges and corners. Pay special attention to ensuring proper concrete consolidation around inset garage door tracks. Add necessary rebar or bolstering 2x4s as the pour progresses per code. Don’t be shy about requesting concrete team members get their hands dirty smoothing needed areas too!
If desired, press coins, objects or personal stamps into the slab during finishing for keepsake nostalgia!
Work swiftly nailing up temporary 2×4 framing around the entire slab perimeter before drying occurs. This forms a short wall preventing uneven edges that love to crumble and crack later on. Bull float the entire surface until any pooled bleed water evaporates while concrete remains workable.
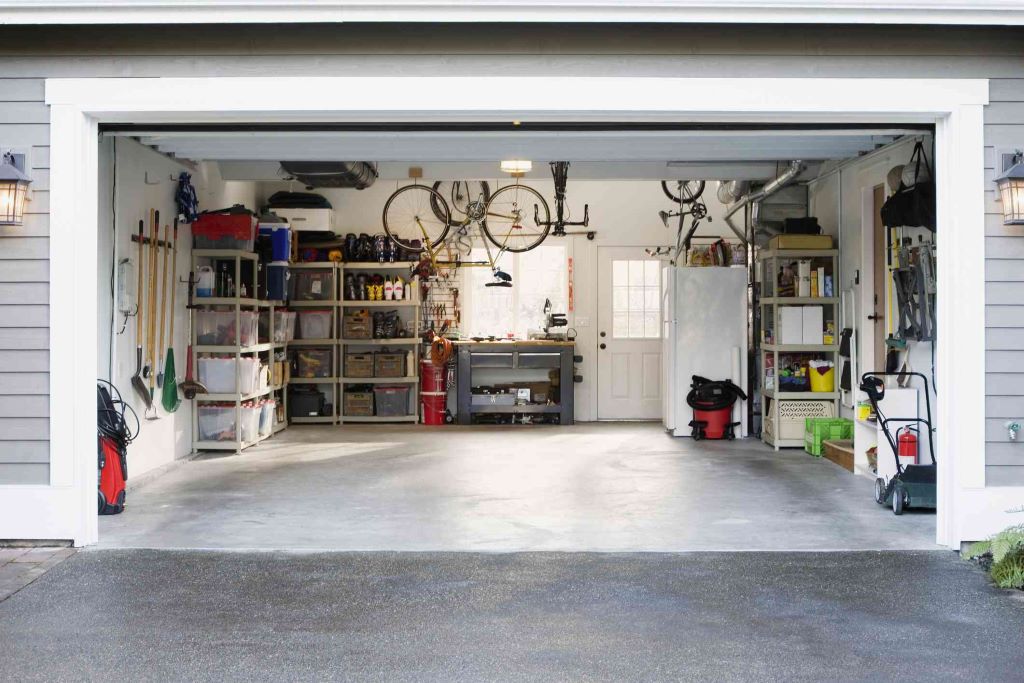
Framing Storage Solutions
What good is all the open garage space without smart storage solutions tailored to organize your stuff safely? Let’s review key areas primed for custom storage builds, including walls, lofts, and free-standing cabinetry. Illustrated plans make projects more approachable too!
Converting an existing room opens up ample vertical real estate for shelves, racks, peg boards and beyond perfect for organizing tools or supplies. Planning adequate wall storage starts by mapping desired locations using graphing paper with room dimensions penciled in. This spatial exercise confirms everything fits before cutting any wood.
Common garage wall systems consist of:
Plywood Backed Shelves – Rip plywood into desired shelf widths like 16 or 24 inches. Anchor strong 2×4 ledger boards mounting shelves via lag screws into studs. Overlay 3⁄4 inch plywood cut flush before adding molded edges for clean finish. Great for manuals, paint cans, auto fluids and lightweight bins.
Slatwall Panels – Modular Slatwall panels are securely fastened to almost any wall material. Their horizontal grooves accept a huge assortment of hooks, baskets, and shelves tailored to store items. A great adaptable solution as needs evolve over time.
French Cleats – For heavier items, french cleats prove invaluable. These interlocking wall mounted rails “hang” cabinets, upper shelving or entire workbenches firmly in place. DIY designs maximize strength while still allowing rearrangements whenever necessary.
Peg Boards – Simple pegboard offers incredible density hanging tools, extension cords, safety gear and more via customizable hook configurations. Paint color coded outlines mapping item locations for quick tool retrieval!
Wire Shelving – Freestanding wire shelving on casters easily relocates, storing awkward items like ladders tight against walls when not needed. Great space savers!
Building storage overhead?
Leave adequate clearance for garage doors and high profile vehicles when planning overhead storage or lofts. But where height allows, lofts create useful second floors perfect for infrequently accessed seasonal items or inventory overflow. Construct loft subfloors from 2×6 joists on 24 inch centers for heavy-duty strength. Then finish surfaces with moisture-resistant plywood able to handle equipment. Add guardrails compliant with height regulations too.
For small parts storage, nothing beats fully utilizing vertical planes by mounting cabinetry near ceilings. Cabinets keep fasteners, electronic components, automotive fluids and cleaning chemicals consolidated, protected and organized. Planning ahead, custom build cabinets matching your expected contents ensuring great fits.
Free Standing Storage Solutions
Sometimes garage items require dedicated free standing storage setups. We’re looking at your air compressors, welding tanks and chainsaw carvings! Dedicated cabinets simplify housing awkwardly shaped goods securely while protecting them from dust or chemical vapors.
For smaller equipment, traditional wood shop style tool chests offer fantastic organization, separating drawers by contents like wrenches, clamps, sockets and more. Consider wheels for mobility too. Upright Roller cabinets serve a similar role, housing drills, rotary tools, spray equipment and automotive specialty tools. Take measurements beforehand, ensuring all of your tools fit inside drawers or cubbies.
Design and build standalone cabinetry matching needed dimensions from 2x4s or plywood for true custom work. Add height appropriate countertops forming multi use workbenches when desired too. French cleat rails mount assemblies securely against walls while still allowing future rearrangements. Make sure to factor in side clearance, ensuring doors are fully open without obstruction.
Taking time planning and constructing custom storage solutions transforms wasted voids into organized spaces prime for personalized garage greatness. Now, let’s shift gears towards wiring required power supporting today’s power-hungry shop tools and vehicle chargers!
Wiring Sufficient Garage Electrical
Start with an accurate room measurement printout sketching walls, doors, windows and any lighting. Use colored pencils indicating planned receptacles or other connections based on anticipated tool locations. Note that a special 220V outlet needs too, like a welder, air compressor, or table saw stations. Reference this evolving wiring schematic as you install new boxes, conduit lines and breaker circuits paneling everything together neatly.
For household current 120V circuits, choose ample gauge 12-2 wiring supplying 20 amp breakers. The increased capacity prevents tripping, which plagues underrated 15 amp lines found in older homes. Space outlets every 4-6 feet around the perimeter at comfortable working heights for shop tools like miter, table or chop saws. Pay special attention to ensuring dust collection equipment reaches available power, too.
Commit dedicated 220 volt wiring for larger stationary equipment like jointers requiring big amp loads unattainable from standard residential wiring. Depending on the planned machinery size, 50 to 70 amp circuits typically suffice. Consult specific tool manufacturer amp ratings before pulling wires. Run dedicated lines instead of splicing from household appliance circuits, too. Wire with 10 gauge copper through conduit for top safety.
Make Everything Accessible
The result remains clean and accessible and allows modifications down the road. Label both breakers and receptacles, clearly indicating served equipment for easy identification.
For overhead lighting, LED shop lights offer high lumen brightness perfect for meticulous jobs. Mount rows on suspended cords, allowing adjustable positioning wherever tasks require best visibility. Daisy chain wiring leapfrogging from one fixture to the next.
Don’t forget about automotive needs, either! Install dedicated GFCI receptacles 20 amp minimum for vehicle battery tender/trickle chargers. And if you own an electric vehicle, factor in sufficient amperage for today’s power-hungry EV battery capacities. Consult regional electrical code books for specifics, ensuring compliance. A good guideline budget is 40 amp capacity per standard EV.
Selecting The Perfect Garage Access Door
What good is an awesome garage without a sweet door letting you drive vehicles or equipment inside? Appropriately sized garage entry doors remain essential in finalizing room conversions protecting contents from the elements when closed. As the most visible garage feature, choosing durable stylish designs adds function while also boosting curb appeal. But with so many opening sizes, materials, and insulation R-value options, landing the right fit proves essential.
FAQs
- How much does it cost to convert a room into a garage?
The cost of converting a room into a garage can vary depending on the size of the room, the materials used, and the labor costs. However, you can expect to spend anywhere from $5,000 to $20,000, with the average cost being around $10,000.
- Do I need a permit to convert a room into a garage?
Yes, you will need to obtain a permit from your local building department before you can begin converting a room into a garage. The permit will ensure that your project meets all local building codes and safety regulations.
- Can I convert a room into a garage myself?
While it is possible to convert a room into a garage yourself, it is recommended that you hire a professional contractor for this project. The process can be complex and requires specialized knowledge and skills. A contractor will be able to ensure that the job is done correctly and safely.
- What is the best way to insulate a garage?
The best way to insulate a garage depends on your climate and budget. Fiberglass batts are a popular and affordable option, while spray foam and rigid foam boards are more expensive but offer better insulation value.
- What type of floor should I install in my garage?
Concrete is the most durable and long-lasting option for a garage floor, but it can be expensive and difficult to install. Tile and epoxy are other popular options that are more affordable and easier to install, but they may not be as durable as concrete.
Final Verdict
Converting a room into a garage is a great way to add storage space to your home. It can also be a great way to create a dedicated space for hobbies or work. By following these easy steps, you can convert your room into a functional and stylish garage. When selecting a quiet garage door opener, prioritize your peace of mind by considering noise levels and ensure a seamless installation by obtaining the required permits and enlisting professional help for any electrical or plumbing adjustments; with careful planning and effort, you can craft a tranquil garage space that you’ll cherish for years to come.