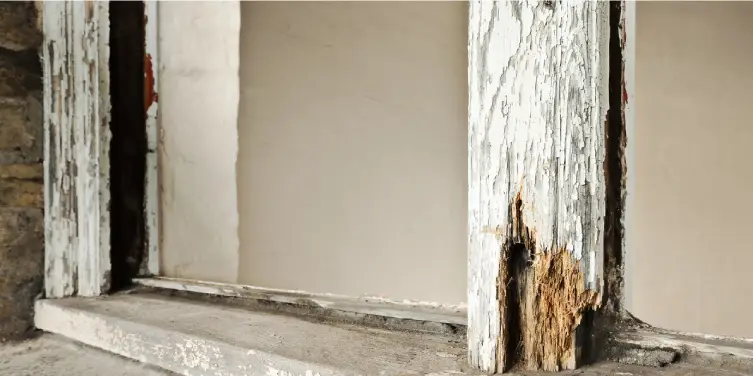
Windows are more than just portals to the outside world; they’re crucial to a home’s structure and aesthetics. Unfortunately, the wood around windows is prone to rot due to moisture exposure. If you’ve noticed soft, crumbling wood around your window frames, it’s time to take action. Replacing rotted wood is a project that can be tackled by a DIY enthusiast with the right tools, knowledge, and a bit of patience.
Why Does Wood Rot Around Windows?
Before we dive into the repair process, let’s understand the root of the problem. Wood rot, also known as decay, is caused by fungi that thrive in moist environments. Window frames, such as those made by Okna Windows, are particularly vulnerable because they’re exposed to rain, snow, and condensation. Over time, the wood absorbs moisture, creating a perfect breeding ground for rot-causing fungi.
Signs of Rotted Wood
- Soft, spongy wood: When pressed, the wood feels soft and easily gives way.
- Discoloration: Rotted wood often turns a dark brown or black color.
- Crumbling or cracking: The wood might crumble when touched or show signs of cracking.
- Paint peeling: Paint may start peeling off in areas where the wood is rotting.

Tools and Materials You’ll Need
- Pry bar
- Hammer
- Chisel
- Wood saw
- Measuring tape
- Safety glasses
- Gloves
- Dust mask
- Replacement wood (treated lumber is recommended)
- Wood hardener (if the rot is minor)
- Wood filler
- Wood glue
- Paint or stain (to match your existing window frame)
- Caulk
Step-by-Step Guide
- Prepare the area: Remove any window treatments, such as curtains or blinds. Put on your safety glasses, gloves, and dust mask to protect yourself.
- Assess the damage: Determine the extent of the rot. If the rot is minor and confined to a small area, you might be able to salvage the wood by applying a wood hardener according to the manufacturer’s instructions. If the rot is extensive, the wood will need to be replaced.
- Remove the rotted wood: Use a pry bar and hammer to carefully pry off the rotted wood. Work slowly and gently to avoid damaging the surrounding wood. If the rot extends to the windowsill, you’ll need to remove that as well.
- Measure and cut replacement wood: Measure the dimensions of the removed wood and cut new pieces to match. If you’re replacing the windowsill, be sure to angle the cuts at the ends to match the existing slope.
- Treat the replacement wood: Apply a wood preservative to the new pieces of wood to protect them from future rot.
- Install the replacement wood: Apply wood glue to the edges of the new wood and fit it into place. Use a hammer and nails or screws to secure the wood.
- Fill gaps and cracks: Use wood filler to fill any gaps or cracks between the new and existing wood. Let the filler dry completely.
- Sand and paint: Sand the repaired area smooth and then paint or stain it to match the rest of the window frame.
- Caulk the edges: Apply a bead of caulk around the edges of the new wood to seal any gaps and prevent moisture from seeping in.
Tips and Considerations
- Safety first: Always wear safety glasses, gloves, and a dust mask when working with wood.
- Choose the right wood: Use treated lumber for outdoor applications to resist rot.
- Take your time: Don’t rush the repair process. Carefully remove the rotted wood and ensure the new wood is properly installed and sealed.
- Consider professional help: If the rot is extensive or you’re unsure of your DIY skills, it’s best to hire a professional carpenter.
Prevention is Key
To prevent future wood rot, it’s important to keep the area around your windows well-maintained. Inspect your windows regularly for signs of damage, and repair any cracks or gaps in the caulking. Make sure your gutters are clean and functioning properly to direct water away from your home’s foundation.
By following these steps and taking preventive measures, you can keep your windows in top condition and protect your home from the damaging effects of wood rot.


