Deep frying at home has become significantly easier and more convenient with modern technology. Gone are the days when you had to deal with messy oil changes and complicated cleaning processes. Today’s self filtering fryer models transform the entire experience, making it possible to enjoy restaurant-quality fried foods without the traditional hassles.
Understanding how to properly use these advanced appliances ensures you get the best results while maximizing the lifespan of both your equipment and cooking oil. This comprehensive guide walks you through everything you need to know about operating, maintaining, and getting the most from your fryer with built-in filtration capabilities.
Understanding How Built-In Filtration Works
Before diving into usage instructions, it helps to understand the technology behind these innovative appliances. Traditional fryers require manual oil filtering or frequent complete oil changes. However, modern units automate this process through clever engineering.
The filtration system typically consists of several components working together. A drainage valve or pump moves used oil from the cooking chamber into a filtration compartment. There, the oil passes through filters that trap food particles, crumbs, and other debris. Clean oil then returns to the cooking chamber, ready for your next batch.
Some models use gravity-fed systems where oil drains naturally through filters. Others employ electric pumps that actively circulate oil through the filtration mechanism. Both approaches effectively remove contaminants that would otherwise break down your oil and affect food quality.
The filters themselves vary by manufacturer. Many use replaceable paper filters similar to coffee filters. Others incorporate permanent metal mesh filters that you can wash and reuse. Understanding which type your model uses affects your maintenance routine and ongoing costs.
Setting Up Your Fryer for First Use
When you first unbox your new appliance, taking time to set it up correctly ensures smooth operation from day one. Start by reading the manufacturer’s manual thoroughly. Each model has specific features and requirements that general advice cannot cover.
Wash all removable parts with warm soapy water before first use. This removes any manufacturing residues or protective coatings. Pay special attention to the cooking basket, lid, and any filter components that contact food or oil.
Choose a suitable location for your fryer. It needs a stable, level surface away from water sources. Ensure adequate ventilation since frying produces steam and cooking odors. Keep the unit away from curtains, paper towels, or anything flammable.
Install or insert the filtration components according to your manual’s instructions. This step is crucial because improperly installed filters can leak or fail to clean oil effectively. Some models require you to prime the pump or run a test cycle before adding oil.
Filling Your Fryer with Oil
Selecting the right oil and using the correct amount sets the foundation for successful frying. Check your fryer’s capacity markings, usually indicated on the interior cooking chamber. These lines show minimum and maximum fill levels.
Never exceed the maximum line. Oil expands when heated, and overfilling can cause dangerous spills. Similarly, don’t underfill below the minimum line, as this can damage heating elements and prevent proper cooking.
Choose oils with high smoke points for deep frying. Peanut oil, canola oil, and vegetable oil work well. Avoid olive oil and butter, which break down at frying temperatures. The oil you select affects flavor, health considerations, and how long it lasts between filtrations.
Pour oil slowly to avoid splashing. Some models have a fill spout or opening designed specifically for adding oil. Using this feature makes the process cleaner and safer. Keep a funnel handy for future oil additions.
Operating Your Fryer Safely
Safety should always be your top priority when working with hot oil. Before plugging in your fryer, ensure everything is properly assembled. Check that the lid fits securely and all components are correctly positioned.
Set your desired temperature according to what you’re cooking. Most foods fry best between 350 and 375 degrees Fahrenheit. Your easy clean deep fryer likely has preset temperature options or a digital control panel. Allow adequate preheating time, typically 10 to 15 minutes.
Watch for the ready indicator light or sound. Attempting to cook before the oil reaches proper temperature results in greasy, undercooked food. Patience during preheating makes a significant difference in your results.
Lower food into the oil gently using the basket. Dropping food creates dangerous splashing. If coating items in batter, let excess drip off first to minimize mess. Don’t overcrowd the basket, which lowers oil temperature and produces soggy results.
Stay nearby while frying. Never leave hot oil unattended. Keep children and pets away from the cooking area. Have a fire extinguisher rated for grease fires within reach, though you hopefully never need it.
Getting the Best Cooking Results
Achieving perfectly fried food requires attention to detail beyond simply turning on your appliance. Start with food at the right temperature. Extremely cold food fresh from the freezer can cause oil temperature to drop dramatically.
Pat food dry before frying. Excess moisture causes oil to bubble and splatter. It also creates steam that interferes with the crispy texture you want. Use paper towels to remove surface moisture from vegetables, chicken, fish, or whatever you’re preparing.
Monitor cooking times carefully. Most foods require just a few minutes in hot oil. Overcooking dries out food and wastes energy. Undercooking poses food safety risks, particularly with poultry and pork.
Use a food thermometer to check internal temperatures of meat and poultry. Visual cues can be deceiving. Golden brown exterior doesn’t guarantee the inside is fully cooked. This practice ensures both safety and quality.
Drain fried food on paper towels or a wire rack. This removes excess oil, improving texture and reducing greasiness. Season immediately while food is hot so flavors adhere properly.
Using the Built-In Filtration System
The filtration feature distinguishes these modern appliances from basic models. However, you must use it correctly to gain the benefits. Most manufacturers recommend filtering oil after every three to five uses, though this varies based on what you cook.
Allow oil to cool before filtering. Hot oil can warp filters and create safety hazards. Most manuals suggest waiting at least two hours after cooking. Some units have a cooling mode that speeds this process safely.
Activate the filtration system according to your model’s design. Electric pump models typically have a button or switch that starts the process. Gravity-fed systems might require you to open a drain valve manually.
The filtration cycle usually takes 10 to 20 minutes. During this time, the system circulates oil through filters and back into the cooking chamber. You’ll hear the pump running if your model uses one. Avoid interrupting this cycle once started.
Check that oil returns to the cooking chamber properly. If flow seems slow or stops, you might have a clogged filter that needs changing. Addressing this promptly prevents damage to the pump or motor.
Maintaining and Replacing Filters
Filter maintenance directly impacts your fryer’s performance and oil quality. Disposable paper filters typically need replacing after each filtration cycle. These filters are inexpensive and easy to change, making them convenient for regular use.
To replace disposable filters, first ensure the system is cool and empty. Remove the filter compartment according to your manual’s instructions. Discard the used filter and insert a fresh one, ensuring it sits flat and covers the entire filter area.
Permanent metal filters require washing instead of replacement. Remove them carefully after oil drains completely. Wash with hot soapy water, using a brush to remove stuck particles. Rinse thoroughly and allow to dry completely before reinstalling.
Never reuse disposable filters. They become saturated with particles and lose effectiveness. Using old filters defeats the purpose of the filtration system and can introduce contamination back into your oil.
Keep spare filters on hand. Running out means you cannot properly maintain your oil, forcing premature replacement. Most manufacturers sell filters in multipacks, making it easy to stock up.
Knowing When to Change Your Oil
Even with excellent filtration, cooking oil eventually degrades and needs complete replacement. Recognizing these signs helps you maintain food quality and safety while maximizing oil lifespan.
Dark color is the most obvious indicator. Fresh oil is light and clear. As it breaks down, oil becomes darker and cloudier. While some darkening is normal, very dark or opaque oil should be changed.
Unpleasant odors signal breakdown. Fresh oil has minimal scent. Rancid or fishy smells indicate oxidation and decomposition. This degraded oil affects food taste and potentially your health.
Excessive smoking at normal temperatures means oil has reached the end of its useful life. The smoke point decreases as oil breaks down. If you notice smoking before food even begins cooking, change the oil immediately.
Foam formation on the oil’s surface indicates breakdown. While some bubbling is normal during cooking, persistent foam covering the oil’s surface is a red flag. This typically happens after extended use or overheating.
Most oils last for 8 to 10 uses with proper filtration. Without filtration, you might only get 3 to 4 uses. Keep track of how many times you’ve used your oil to help determine when replacement is due.
Cleaning Your Fryer Thoroughly
Regular cleaning beyond just filtering maintains your appliance’s performance and hygiene. A thorough cleaning should happen every few weeks or whenever you change oil completely.
Start by draining all oil from the system. Most models have a drain valve or method for emptying the cooking chamber. Pour used oil into a sealed container for proper disposal. Never pour oil down your drain.
Wipe the interior cooking chamber with paper towels to remove residual oil. Then wash it with hot soapy water and a non-abrasive sponge. Avoid harsh scrubbers that might damage non-stick coatings.
Clean the heating element carefully. Buildup on this component reduces efficiency and can create burning smells. Follow your manual’s specific instructions, as some elements cannot get wet.
Wash the basket, lid, and all removable parts. These usually go in the dishwasher, but check your manual first. Hand washing with degreasing dish soap works well too.
Clean the exterior with a damp cloth and appropriate cleaner. Grease splatters accumulate on the outside, attracting dust. Regular wiping keeps your appliance looking new and prevents buildup.
Troubleshooting Common Issues
Understanding how to address common problems saves frustration and repair costs. Many issues have simple solutions you can handle yourself without professional help.
If the filtration system isn’t working, check that all components are properly installed. Misaligned filters or loose connections prevent proper operation. Ensure the filter compartment is fully seated and locked in place.
Weak or no oil flow during filtration often indicates a clogged filter. Replace disposable filters or clean permanent ones. Additionally, check for debris blocking drain valves or pump inlets.
Temperature control problems might stem from mineral buildup on heating elements. Regular cleaning prevents this issue. If cleaning doesn’t help, the thermostat or heating element might need professional service.
Unusual noises during operation could indicate several things. Grinding or whining from the pump suggests debris or mechanical issues. Clicking might come from the thermostat cycling normally. Consult your manual to distinguish normal sounds from problems.
Oil leaking from the fryer requires immediate attention. Check all seals and gaskets for damage. Ensure the drain valve is fully closed. Tighten any loose connections. Persistent leaks might require replacement parts or professional repair.
Maximizing Oil Life Between Changes
Getting the most from your cooking oil reduces costs and waste. Several practices help extend oil life beyond what filtration alone provides.
Use the right temperature for each food type. Excessively high temperatures break down oil faster. Cooking everything at maximum heat is unnecessary and wasteful. Follow recipe recommendations for optimal results and oil longevity.
Avoid salt and acidic marinades before frying. These ingredients accelerate oil breakdown. Season food after frying instead. If using marinades, pat food very dry before it enters the oil.
Minimize water content in foods you fry. As mentioned earlier, moisture causes problems. It also introduces impurities that contaminate oil. Even small amounts of water accelerate degradation.
Store your fryer properly between uses. Keep it covered to prevent dust and contaminants from entering the oil. If you won’t use it for extended periods, consider storing it empty and adding fresh oil before next use.
Filter regularly rather than waiting until oil looks bad. Proactive filtration removes particles before they break down and damage oil quality. Think of it as preventive maintenance that pays dividends.
Exploring Recipe Possibilities
Your self filtering fryer opens up a world of culinary possibilities. Understanding what works best helps you make the most of your investment.
Classic fried chicken remains a favorite for good reason. The even heat and oil quality from your fryer produces crispy skin and juicy meat. Experiment with different seasonings and coating styles.
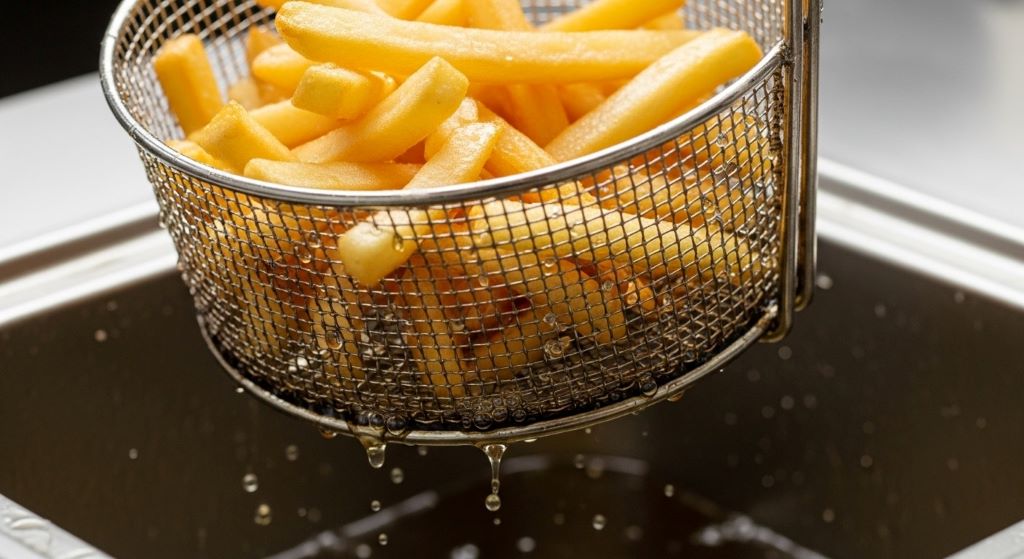
French fries and other potato preparations are natural choices. Cut potatoes into your preferred shape, soak in cold water to remove excess starch, pat dry thoroughly, and fry until golden. The results rival any restaurant.
Seafood fries beautifully in properly maintained oil. Fish, shrimp, calamari, and scallops all work well. The key is not overcrowding and using the right temperature for each type.
Vegetables offer healthier fried options. Zucchini, mushrooms, green beans, and cauliflower all taste amazing when fried. Light batters or breading complement their natural flavors.
Desserts provide surprising uses for your fryer. Donuts, funnel cakes, churros, and fried fruit fritters all come out wonderfully. Just be sure to clean your fryer thoroughly between savory and sweet preparations.
Safety Considerations for Long-Term Use
Maintaining safety awareness prevents accidents and ensures years of trouble-free operation. Some considerations go beyond basic operation instructions.
Regularly inspect the power cord for damage. Frayed or exposed wires create shock and fire hazards. Replace damaged cords immediately rather than attempting repairs.
Keep your fryer’s ventilation openings clear. Blocked vents cause overheating and potential component failure. Wipe away any grease or debris that accumulates around these areas.
Test the automatic shutoff feature if your model has one. This safety mechanism prevents overheating if the thermostat fails. Follow your manual’s instructions for testing this feature periodically.
Develop a routine for safe disposal of used oil. Local recycling centers often accept cooking oil. Some automotive shops take it for biodiesel production. Never pour it down drains or into the garbage where it can leak.
Consider registering your product with the manufacturer. This ensures you receive safety notices or recall information. It also simplifies warranty claims if problems arise.
Conclusion
Mastering your easy clean deep fryer with built-in filtration transforms home cooking. These appliances eliminate the messiest aspects of deep frying while delivering professional results. Understanding proper setup, operation, and maintenance ensures you get maximum value from your investment.
The filtration system is the star feature that sets these fryers apart. Using it correctly extends oil life, improves food quality, and simplifies cleanup. Regular filter changes and proper timing of filtration cycles are essential for optimal performance.
Safety should never become an afterthought. Following proper procedures protects you and your family while preventing damage to your appliance. Taking time to understand your specific model’s features and requirements pays off in reliable, long-term performance.
With the knowledge from this guide, you can confidently prepare delicious fried foods at home. From crispy chicken to golden french fries, your fryer makes it all possible with minimal hassle. Enjoy exploring new recipes and sharing perfectly fried creations with family and friends.
Frequently Asked Questions
How often should I filter the oil in my fryer?
Filter your oil after every three to five uses for best results. However, adjust this frequency based on what you cook. Foods that produce more crumbs or particles require more frequent filtering. Heavy battering or breading also necessitates more regular filtration. Always filter if you notice visible particles or if oil appears darker than usual.
Can I mix different types of oil in my fryer?
Mixing oils is generally not recommended. Different oils have varying smoke points and flavors that don’t always blend well. If you must combine oils, choose types with similar characteristics and smoke points. However, it’s better to completely change oil rather than topping off with a different variety.
How long does filtered oil last compared to unfiltered oil?
Properly filtered oil can last two to three times longer than unfiltered oil. While unfiltered oil might be good for three to four uses, filtered oil often extends to eight to ten uses. Actual lifespan depends on what you cook, cooking temperature, and how well you maintain the filtration system.
What should I do if my fryer’s filtration system stops working?
First, check for simple issues like clogged filters or incorrect installation. Replace or clean filters as needed. Ensure all components are properly seated and the drain valve operates correctly. If problems persist after these checks, consult your user manual’s troubleshooting section or contact customer service for guidance.
Is it safe to leave oil in the fryer between uses?
Yes, leaving filtered oil in your fryer between uses is safe and convenient. Keep the unit covered to prevent contamination from dust or debris. Store it in a cool location away from direct sunlight. However, if you won’t use the fryer for several weeks, consider draining and storing the oil separately in a sealed container.
Related Topics:
2025’s Rising Stars in Home Blending Tech: Power Meets Portability
How to use colour blocking in your kitchen