When it comes to renovating your kitchen or bathroom, one of the tasks that may arise is the removal of granite countertops. Whether replacing them with new countertops or simply looking to change the overall aesthetic of your space, it is essential to understand the proper techniques for safely removing granite countertops. In this article, we will guide you through the step-by-step process to ensure a successful and hassle-free removal without causing any damage to the surrounding areas. Let’s dive in to remove granite countertops safely!
Tools and Materials You Will Need
Before you begin the removal process, gathering the necessary tools and materials is crucial. Here is a list of items you will need:
- Safety Equipment:
- Safety goggles
- Dust mask
- Work gloves
- Hand Tools:
- Pry bar
- Putty knife
- Utility knife
- Hammer
- Power Tools:
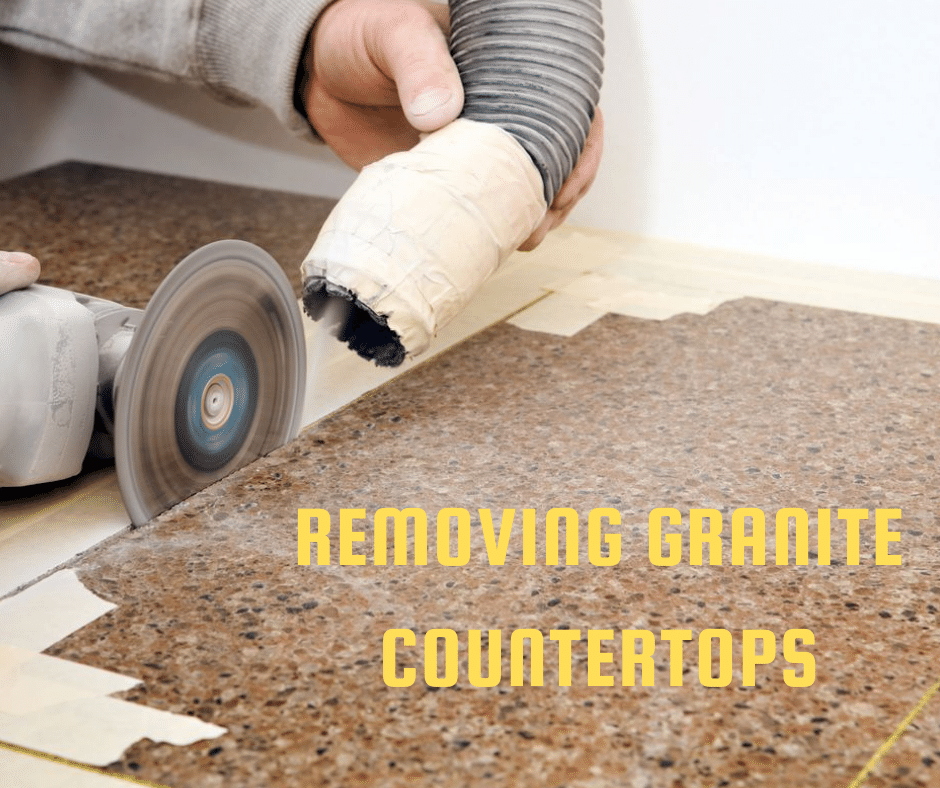
- Circular saw with a diamond blade
- Angle grinder with a diamond blade
- Protective Materials:
- Plastic sheets
- Cardboard
- Drop cloths
- Adhesive Remover:
- Granite-safe adhesive remover
- Plastic scraper
- Cleaning Supplies:
- Mild detergent
- Soft cloth
Ensure you have all these items readily available before starting the removal process. This will help you maintain efficiency and safety throughout the project.
Step-by-Step Guide
Step 1: Prepare the Work Area

To protect the surrounding areas from potential damage during the removal process, it is essential to take some preparatory steps:
- Cover the floor and nearby furniture with plastic sheets, cardboard, or drop cloths. This will prevent any accidental scratches or stains.
- Turn off the power supply to any electrical outlets near the countertop area. Safety should always be a top priority.
Step 2: Disconnect Plumbing and Appliances
Before removing the granite countertop, you need to disconnect any plumbing fixtures or appliances attached to it. Follow these steps:
- Shut off the water supply to the sink and disconnect the plumbing connections using an adjustable wrench.
- If there are any appliances, such as stoves or dishwashers, adjacent to the countertop, unplug and remove them to create a clear workspace.
Step 3: Loosen the Adhesive
Most granite countertops are secured to the cabinets using adhesive. To safely remove the countertop, you need to loosen the adhesive bond. Here’s how:
- Start by using a putty knife or utility knife to cut through the caulk seal between the countertop and the wall.
- Next, insert a pry bar or putty knife between the countertop and the cabinet surface. Gently apply pressure to loosen the adhesive bond. Repeat this process along the entire length of the countertop.
Step 4: Lift and Remove the Countertop
With the adhesive bond loosened, it’s time to lift and remove the granite countertop. Follow these steps carefully:
- Enlist the help of another person to ensure a safe and efficient removal. Granite countertops can be heavy, and having an extra set of hands will make the process smoother.
- Starting from one end, gently lift the countertop, applying even pressure along its length. Avoid jerking or twisting motions, as this can cause damage to the countertop or cabinets.
- Once the countertop is lifted, place it on a soft and stable surface, such as cardboard or blankets, to prevent any scratches or cracks.
Step 5: Clean and Reinstall
After successfully removing the granite countertop, it’s important to clean both the countertop and the cabinet surface to ensure a smooth reinstallation. Follow these cleaning steps:
- Use a mild detergent mixed with water to clean the granite countertop. Gently scrub the surface using a soft cloth or sponge. Avoid using abrasive cleaners or scrub brushes, as they can cause scratches.
- Wipe down the cabinet surface with a damp cloth to remove any debris or residue left behind.
- Allow both the countertop and cabinet surface to dry completely before proceeding with the reinstallation.
Step 6: Reinstall or Replace
Now that the granite countertop and the cabinet surface are clean and dry, you have the option to either reinstall the same countertop or replace it with a new one. Consider the following factors when making your decision:
- Condition of the Countertop: Assess the condition of the granite countertop. If it is still in good shape and matches your desired aesthetic, you can reinstall it. However, if it is damaged or you wish to upgrade, it might be best to choose a new countertop.
- Budget: Determine your budget for the project. Reinstalling the existing countertop can save you money compared to purchasing a new one. Consider the cost of materials, installation, and any additional modifications required.
- Design and Style: Consider if the current countertop aligns with your design preferences. If you are looking for a different color or pattern, replacing it might be the better option.
Step 7: Professional Assistance
If you are unsure about your ability to safely remove or reinstall granite countertops, it is always recommended to seek professional assistance. Professional contractors have the expertise and specialized tools to handle the job efficiently and with minimal risk.
Additionally, hiring professionals can save you time and effort, ensuring that the countertop removal and installation are done correctly. They can also provide guidance on choosing the right countertop materials and offer valuable advice on maintenance and care.
Conclusion
Removing granite countertops safely requires careful preparation, the right tools, and a systematic approach. By following the step-by-step guide outlined in this article, you can successfully remove granite countertops without causing any damage to your kitchen or bathroom.
Remember to gather all the necessary tools and materials, disconnect plumbing and appliances, loosen the adhesive bond, lift and remove the countertop with caution, clean the surfaces thoroughly, and make an informed decision about reinstalling or replacing the countertop.
Always prioritize safety throughout the process and, if needed, consult professional contractors for expert assistance. With the right techniques and attention to detail, you can achieve a successful granite countertop removal and create a fresh, updated look for your space.


