There are a few steps that you can take to ensure that your bathtub is leveled before it is set into place. This will help to prevent any issues in the future with your tub not sitting flat on the floor or walls.
How to level a bathtub?
It is important to ensure that you are leveling your bathtub properly before you set it in place. If the tub is not level, the mortar will not stick properly and it could crack or fall out completely. This will result in a tub that is not level, which can cause safety issues for the user of your new bathtub.
You can use a string line to help determine if your tub is level or not. Place the string line along one side of the bottom of your bathtub, then measure its length using a tape measurer or ruler. Next, do this with other sides until all four corners have been measured and recorded so that there aren’t any differences between them; this should indicate an unleveled bathtub if any discrepancies are found at all!
Step 1 – Getting Started
Before you can even think about leveling your bathtub, it’s important to make sure that the floor is level. Check the walls and check that they’re straight and plumb (parallel to the ceiling). Next, check your ceiling to see how level it is. If you have a sloped ceiling, this may mean adding support beams or posts in certain places.
Next, measure the length of your tub and ensure that it is centered on its own base. You’ll need some space around each side for leveling purposes later on. Finally, measure width: Your bathtub should be about four feet wide at its widest point; anything smaller than this will likely require an adjustment in order for a person not to feel cramped inside during use (and possibly even more so during cleaning). If there are any large bumps or dips along these dimensions.
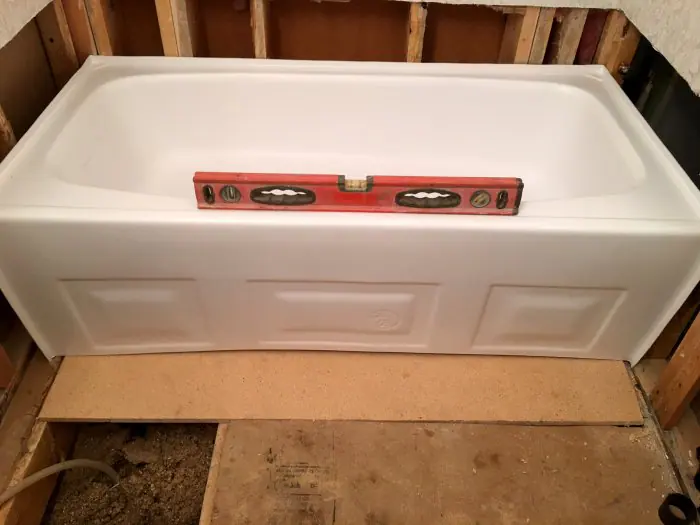
Step 2 – Leveling the Bathtub
To level the tub, you’ll need a few tools. You can either use a laser level or a bubble level to check whether your tub is level, but both methods require that you have access to some sort of flat surface. If you don’t have anything like this available, then consider using a friend or family member as an extra pair of hands.
First, grab the bubble level and position it so that it’s standing up against one side of your bathtub. Now look along its length. If there are bubbles above and below center line, then that means that side is high; if there are no bubbles visible at all and only one tiny bubble at center line (or just under), then this means that side is low; finally if there are multiple bubbles appearing above and below center line (more than two) then this means your bathtub isn’t quite leveled yet!
Step 3 – Laying the Cement Board
After the subfloor has been prepared, it is time to lay the cement board.
First, make sure that you have a level handy. The last thing you want is to spend hours leveling your tub only to realize that one side is higher than the other.
Make sure that the surface where you are laying your cement board is clean and free from debris. Lay down sheets of plastic to protect any surfaces from getting covered with concrete particles or dust from sanding the surface before installing your tub surround kit.
Apply adhesive-backed cement board tape along all edges where seams will be visible on finished walls (such as in showers).
Step 4 – Finishing Touches
After you’ve let the mortar cure for 24 hours, you can begin to fill your tub and test it for leaks. If there are any minor problems, you can use a wet/dry vacuum to clean them up before they become major issues.
Finally, apply a water-resistant sealer to protect your mortar from stains and water damage in the future—it will be well worth it!
Conclusion
This should be the final step in your bathroom remodel. After you have leveled the tub and installed a cement board, you can start laying tile. Make sure that all of your cuts are made properly so that you will end up with a perfect line with no gaps between tiles!