Are you tired of that constant, annoying sound of a dripping tap keeping you up at night? Don’t worry, you’re not alone! A dripping tap can be a real nuisance, but the good news is that fixing it is often simpler than you might think. In this guide, we’ll walk you through the steps on how to fix a dripping tap and regain your peace and quiet.
Understanding the Anatomy of a Tap
Before we dive into the fixing process, it’s essential to understand the basic components of a tap. A typical tap consists of a spout, handles (usually one for hot and one for cold), and internal mechanisms that control the flow of water. The most common cause of a dripping tap is a worn-out washer or seal within the tap mechanism. However, if you have an outdoor faucet too low to the ground, it can also cause problems with water flow and pressure.

Tools You’ll Need
Gather the following tools before you start:
- Adjustable wrench
- Screwdrivers
- Replacement washers and O-rings
- Plumber’s tape
- Towels or rags
Step 1: Turn Off the Water Supply
The first step is to turn off the water supply to the tap you’re fixing. Look for the shut-off valves under the sink and turn them clockwise until they’re fully closed. This will prevent any water from flowing while you work on the tap.
Step 2: Disassemble the Tap
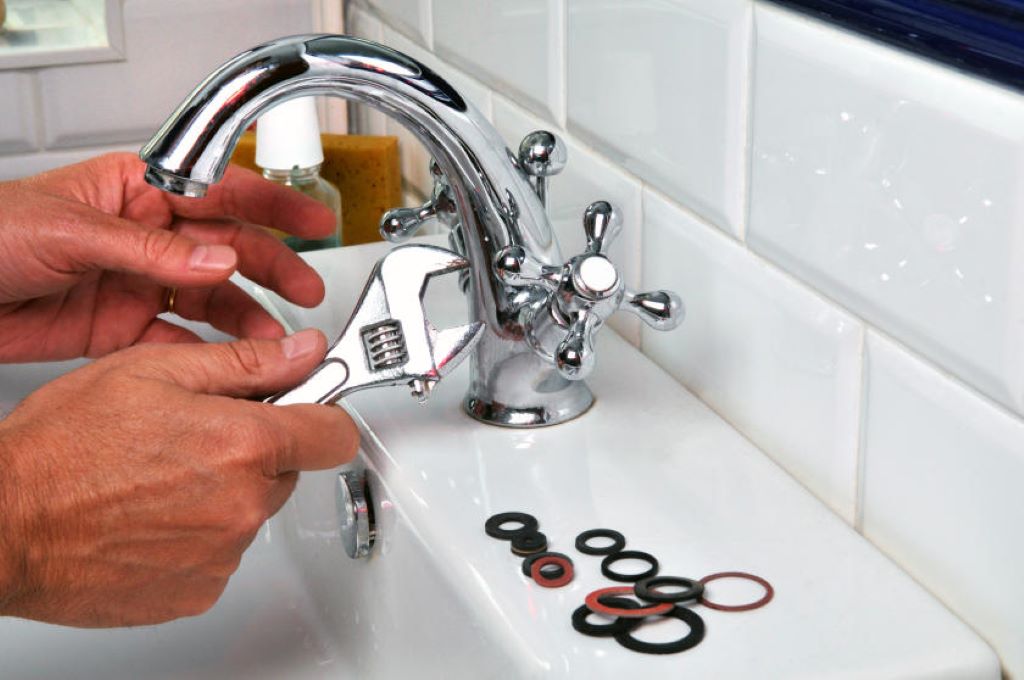
Use a screwdriver to remove the tap’s handle. This will expose the inner cartridge or valve. Carefully remove the cartridge using an adjustable wrench, taking note of its orientation so you can put it back together correctly.

Step 3: Inspect and Replace Washers
Examine the removed cartridge for any signs of wear, such as cracks or tears in the rubber washers or O-rings. If you spot any damage, it’s time to replace them. Head to your local hardware store and find replacement parts that match your tap’s make and model.
Step 4: Apply Plumber’s Tape
Before reassembling the tap, wrap the plumber’s tape around the valve stem’s threads. This will create a watertight seal and prevent leaks.
Step 5: Reassemble and Test
Carefully put the tap cartridge back in place and secure it with the adjustable wrench. Then, reattach the tap handle. Once everything is back in position, turn the water supply back on and test your tap. If the dripping has stopped, congratulations! You’ve successfully fixed your tap.
Common Mistakes to Avoid
- Over-tightening: Be gentle when reassembling the tap to avoid damaging components.
- Using the Wrong Parts: Make sure you use the correct replacement parts to prevent further issues.
- Rushing: Take your time to ensure each step is done correctly and meticulously.
Conclusion
Fixing a dripping tap is a DIY task that doesn’t require extensive plumbing knowledge. By following these steps, you can save money on a plumber and enjoy a peaceful, drip-free environment once again, just like you did when you learned how to clean limescale from taps.
FAQs About Fixing Dripping Taps
Can I use any replacement washer for my tap?
It’s best to use washers specifically designed for your tap’s make and model to ensure a proper fit and function.
Why does my tap keep dripping even after replacing the washer?
If the dripping persists, there might be other underlying issues, such as a damaged valve seat that requires professional attention.
Do I need to turn off the main water supply to fix a dripping tap?
No, you can usually turn off the water supply to the specific tap you’re working on using the shut-off valves under the sink.
Is fixing a tap something I can do on my own, or should I hire a professional?
Fixing a dripping tap is often a DIY task, but if you’re unsure or encounter difficulties, don’t hesitate to seek professional help.
What’s the main cause of a dripping tap?
In most cases, a worn-out washer or O-ring within the tap mechanism is the culprit behind a dripping tap.