Wall plugs—also known as rawl plugs or anchors—are a handy solution for hanging heavy items securely on your wall. But when it’s time to redecorate or remove fixtures, they can quickly turn into a frustrating problem. If you’ve ever tried to take one out and ended up chipping paint or damaging drywall, you’re not alone. The good news? There’s a quick and easy trick to remove wall plugs without ruining your wall.
Whether you’re moving out, patching up your wall, or just want a cleaner finish, this guide will help you through it. With practical advice from DIY enthusiasts and home improvement experts—including tips featured on trusted platforms like House Needy—you’ll learn the safest and most efficient way to remove wall plugs like a pro.
Why Removing Wall Plugs the Right Way Matters
Wall plugs are designed to grip tightly. That’s great for mounting shelves or TV brackets—but not so great when you’re trying to get them out. If you’re not careful, yanking them out can:
- Tear your drywall
- Crack plaster or brick
- Leave large holes that are hard to patch
Instead of brute force, a gentle, methodical approach is the secret to clean results. If you’re wondering exactly how to get wall plugs out without causing damage, this step-by-step guide breaks it down clearly.
Tools You’ll Need
Before you begin, make sure you have the right tools on hand:
- Needle-nose pliers or a screw
- A flathead screwdriver
- A utility knife or box cutter
- Wall filler or spackle
- Sandpaper (fine-grit)
- A touch-up paintbrush
Having these items ready makes the job quicker and reduces the chance of further damage.
Step-by-Step: How to Get Wall Plugs Out Safely
-
Assess the Plug Type
Not all wall plugs are the same. Some are plastic expansion plugs, while others are metal or threaded. The removal process may differ slightly depending on which type is in your wall.
-
Try Pulling It Out Gently
Using needle-nose pliers, grip the edge of the plug and slowly wiggle it side to side as you pull. Avoid using excessive force.
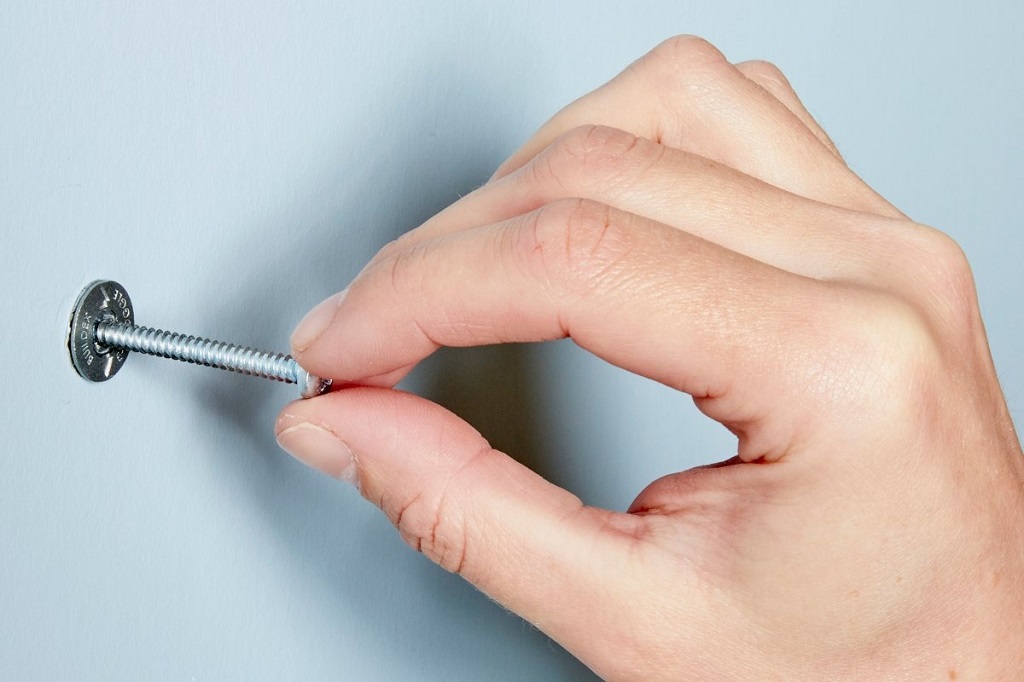
If you can’t get a good grip with pliers, try this trick:
- Insert a long screw into the plug, but don’t screw it all the way in.
- Leave about half an inch sticking out.
- Use the screw to pull the plug out gently with a steady motion.
-
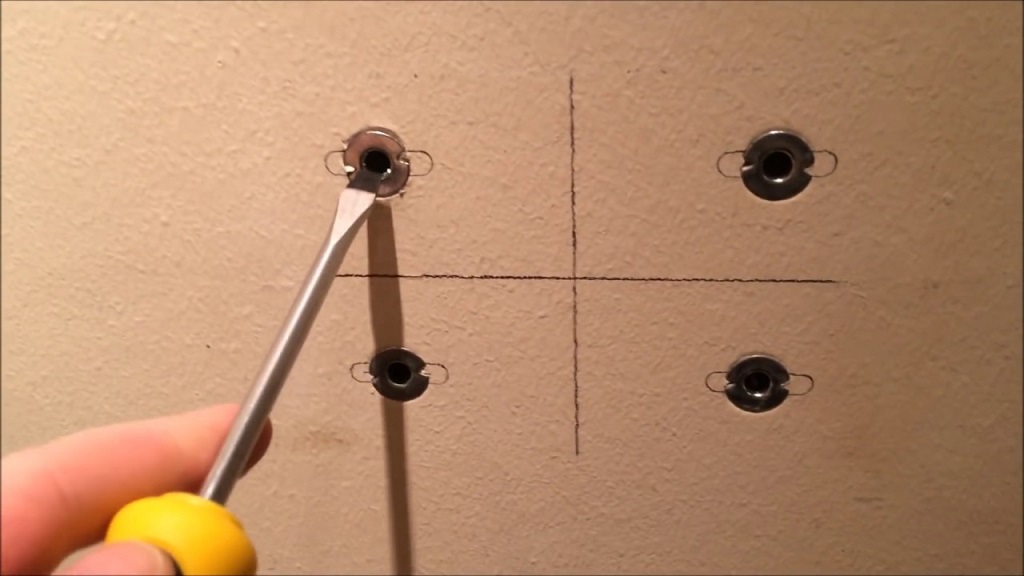
Push It In (If It Won’t Budge)
If the plug refuses to come out cleanly, pushing it in may be the better option.
- Use a screwdriver to tap it slightly deeper into the wall.
- Once it’s below the surface, patch the hole using wall filler or spackle.
This method prevents chipping and lets you repaint over a flat surface later.
-
Clean and Fill the Hole
Once the plug is removed or pushed in:
- Trim any loose edges with a utility knife.
- Apply filler using a putty knife or your finger.
- Let it dry completely (usually a few hours).
- Sand it smooth and touch up with paint.
-
Avoid Common Mistakes
- Never yank wall plugs without assessing the wall type—drywall is more fragile than brick or concrete.
- Don’t use power tools unless absolutely necessary; they can do more harm than good in delicate areas.
Alternative DIY Trick: Using a Wine Corkscrew
This unexpected method works well on standard plastic wall plugs:
- Insert the corkscrew into the plug just like you would into a cork.
- Once it’s in snugly, pull out the plug with a steady hand.
This gentle motion helps reduce pressure on the surrounding wall material.
When to Call a Professional
If you’re dealing with:
- Concrete or brick walls with deeply embedded plugs
- Fragile plaster walls in older homes
- Multiple wall plugs across a large area
…it might be worth hiring a handyman or professional. This is especially true if you’re prepping your home for sale or rental. According to Better Homes & Gardens, even minor wall damage can affect a room’s overall appeal to buyers or renters.
How to Prevent Wall Damage in the Future
Once your wall plugs are out and your wall is restored, consider alternative hanging methods to avoid future issues:
- Use adhesive hooks for lightweight items
- Try tension rods or over-the-door racks
- Install a picture rail to hang decor without holes
These methods can save you time and repairs down the line.
Read More Also: Does a Jacuzzi Bathtub Add Value to Your Home? A Deep Dive
Final Thoughts
Learning how to get wall plugs out the right way saves you from unwanted repairs and keeps your walls looking neat. Whether you’re dealing with a stubborn plug or just want a clean finish, using gentle DIY techniques ensures your home stays in great shape.
For more practical guides and easy home repair tips, visit House Needy—a trusted resource for DIY homeowners everywhere.
Read More Also: Bubbles and Bliss: Can You Put Bubble Bath in a Jacuzzi Tub? Unraveling the Sudsy Mystery
FAQs: How to Get Wall Plugs Out
-
Can I reuse wall plugs once I remove them?
No, most wall plugs deform during installation. Reusing them can lead to weak support and damage.
-
What if the wall plug is stuck in brick or concrete?
In masonry, you can use a masonry bit to drill it out or tap it in deeper and patch the surface.
-
How do I hide the hole left by a wall plug?
Use spackle or wall filler to cover the hole. Once dry, sand and repaint to blend it seamlessly.
-
Is there a tool specifically for removing wall plugs?
There’s no universal tool, but pliers, screws, and corkscrews work well for most common types.
-
Can wall plugs damage electrical wires inside the wall?
If installed or removed near wiring, there’s a risk. Use caution and avoid forcing anything deep into walls without knowing what’s behind them.