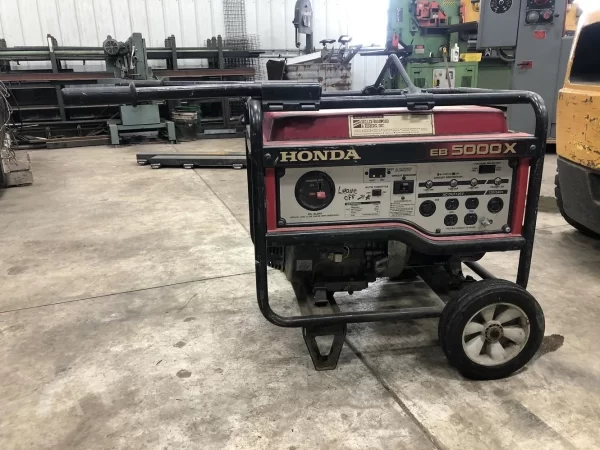
Some people have a generator sitting in their garage or basement. They bought it years ago, but they haven’t used it since. You should know that running a generator without using it regularly can cause serious problems with the engine. These include damage to the carburetor and ignition system as well as problems with fuel quality over time (due to evaporation). That’s why we recommend using your generator every few months so that you’ll be prepared when an emergency strikes!
Locate the drain plug
Once you’ve located the drain plug on your engine, remove it with a wrench. This should be a small metal plug with a hole in the center.
The location of the drain plug is usually near or at the bottom of the engine housing, near where oil would normally drain out during normal operation. It’s often in close proximity to an oil filter as well—depending on your model, you may want to remove both together so that you don’t get oil all over yourself while working on this step.
Clean the area around the drain plug
You may also want to clean the area around the drain plug. Remove any dirt or debris from around the hole, and then use a rag (or shop vacuum if you have one) to wipe down the entire area before moving on to step 2.
Prepare a container
A good container is essential. You’ll need one that’s big enough to hold all the oil that will drain out, but not so big that you’ll have a hard time carrying it around. A sturdy plastic container, such as those used for paint or motor oil, will work best. The last thing you want to do is create an accident by spilling gasoline or oil on yourself or in your house/car.
Remove the drain plug
Remove the drain plug. Use a wrench to loosen and remove the drain plug from the bottom of the engine. If you are unable to loosen it with your hands, use a hammer and punch to tap on it until it loosens.
Be careful when doing this! Make sure that you have a container ready to catch all of the oil that comes out of your generator as soon as you remove its drain plug.
Drain the oil
When you’re ready to start the generator, remove the oil cap and check for debris that may have accumulated during storage. If there is any debris in your oil, it could cause engine damage if left in place. Remove all of this material by hand or with a shop-vacuum before proceeding.
Next, drain your fuel tank by placing a clean container under the fuel cap and loosening it; allow any fuel to drain into your container until it is empty. If you plan on storing your generator for an extended period of time (more than two weeks), remove both batteries from their housings and store them in cold conditions outdoors or in a refrigerator (this will prevent corrosion from occurring).
Once all of these steps have been completed, go ahead and start up your power equipment!
Replace the drain plug and tighten it securely
After you have drained the oil, replace and tighten the drain plug. Use a torque wrench to tighten it securely. Check your owner’s manual for the correct torque setting; most manufacturers recommend 80 to 100 inch-pounds of torque on this particular fastener.
Locate the spark plugs
The location of the spark plugs will vary from engine to engine. On some engines, they can be found in a plastic housing near the engine block, while on others they are located farther away from the block and require removing a cover to access them. If you are unsure of where your spark plugs are located, consult your owner’s manual or hire a professional mechanic to help you with this step.
Remove and inspect them
Once you’ve located the generator and removed it from the engine, you’ll have to inspect it. If your generator is equipped with a “voltage regulator” (which will look like a little box), remove it as well. Inspect all of the wires that connect your generator to other parts of your engine, looking for any signs of damage or wear, and check that they are properly secured. Next, inspect each spark plug on the generator’s head with an ohmmeter—if one reads less than 1 ohm resistance between its terminal wire and ground (either by touching together those two points or using two probes on different terminals), replace that spark plug immediately before attempting to start up again.
Clean them if necessary and replace them
If you take the time to clean them, you can save yourself the hassle of trying to get that old generator working again. It’s a good idea to replace the spark plugs if they are dirty, worn out or corroded. If you’re unsure whether or not your spark plugs need replacing, check their condition with a wire brush before assembling them back into your generator’s engine block.
Locate the air filter/cleaner housing
The air filter/cleaner housing is located on the exterior of your generator near the top. To remove it, you will need to unscrew two Phillips-head screws.
Once you have removed the housing, clean all visible dirt from inside with a soft cloth or paper towel and then replace the air filter/cleaner element. You can tell when it needs to be replaced because it will show signs of wear and tear, or if there are signs that your unit has been leaking oil (which causes dirt buildup).
Unscrew or unsnap it to remove it from the engine compartment
If the cover is snapped on, you’ll need to use a screwdriver or flathead screwdriver to pry it off. If you’re having trouble with this, try using a hammer to gently tap the cover loose before trying again with the screwdriver.
Conclusion
These are just a few of the steps you need to take when starting your generator. You can also check out our guide on how to start a portable generator for more tips. If you’re looking for more information about generators, please don’t hesitate to contact us today! We’ll be happy to answer any questions or concerns you may have about these machines and how they work.