Having problems with your garage door opening and closing properly? Issues like a door not fully opening or closing, a door that opens too quickly or forcefully, or a door that sags while open could all indicate that your garage door torsion springs need adjusting. Properly adjusting torsion springs is crucial for smooth and safe garage door operation.
Adjusting torsion springs can be a tricky process, but with the right tools and safety precautions, it can be done safely and efficiently by a homeowner. In this article, we’ll walk you through how to adjust the torsion springs on garage door.
Understanding Torsion Springs
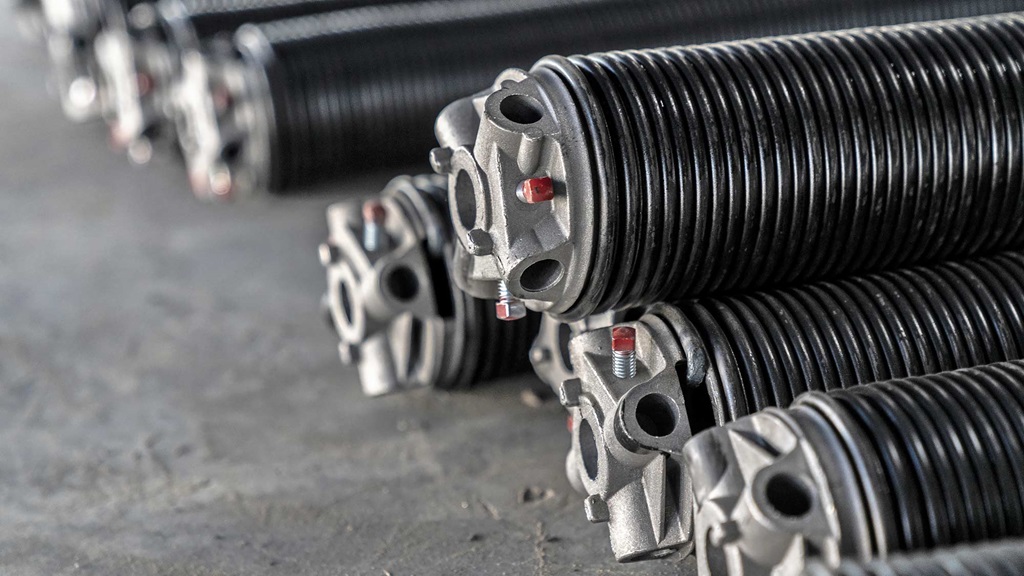
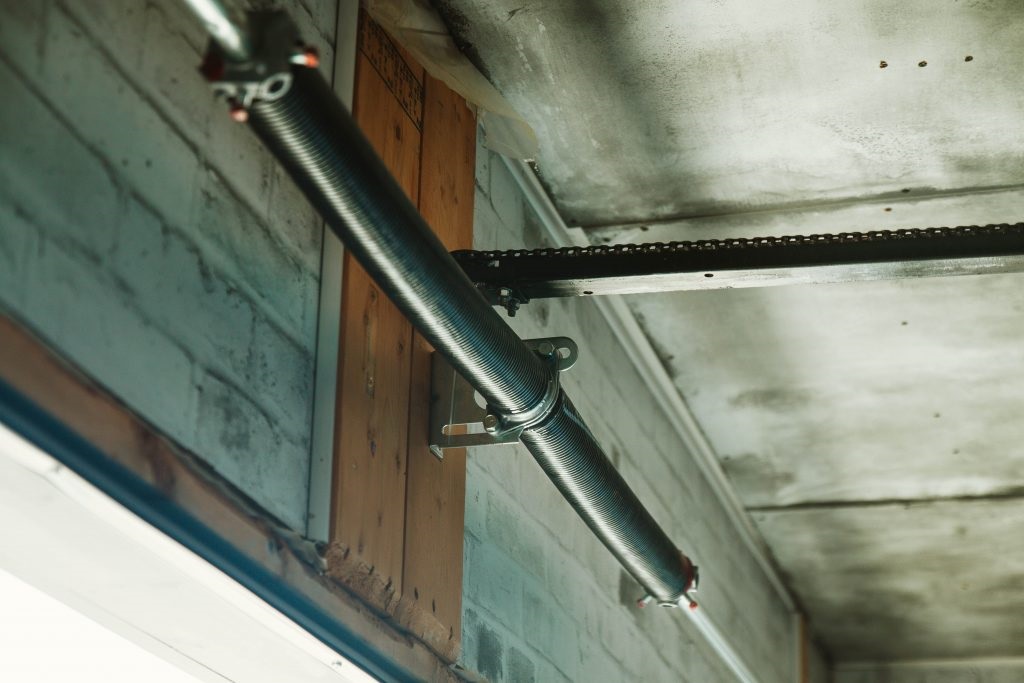
Torsion springs are an essential component of any garage door. They are located above the door, mounted to a metal shaft that runs parallel to the door. The springs wind and unwind as the door opens and closes, counterbalancing the weight of the door to allow smooth operation.
There are two types of torsion spring systems:
- Standard torsion – This consists of one solid metal torsion spring mounted on the torsion shaft. This is the most common type of torsion spring system.
- EZ-Set torsion – This consists of three smaller springs bundled together and mounted on the torsion shaft. This system allows for easier spring adjustment.
The torsion springs have a certain amount of tension in them when the garage door is closed. This counterbalances the weight of the door so that when you open the door, the springs unwind and allow the door to open more easily.
Over time, these springs can lose some of their tension. This could be due to normal metal fatigue over years of use, or to extended use without lubrication. Reduced tension in the torsion springs will cause issues with door operation, necessitating adjusting them to restore proper tension.
Safety Precautions

Adjusting torsion springs can be an extremely dangerous process if not done correctly. The springs are under a significant amount of tension and hold a substantial amount of potential energy. Make sure to take the following safety precautions before adjusting your torsion springs:
- Use extreme caution and stay focused when working with torsion springs. The springs are under high tension and could cause severe injury if they break or slip while being adjusted.
- Wear protective gear like safety goggles and leather gloves. This will protect you in case a spring were to break while being worked on.
- Make sure the garage door is fully closed before beginning work. This minimizes the tension on the springs while adjusting them.
- Do not attempt adjustments without the proper tools. Using makeshift tools can be unsafe.
- Only loosen tension slightly at a time, avoiding sudden large adjustments. Gradual adjustments are safer.
- Make sure to call a professional if you are uncomfortable with the process or equipment needed. Repairing torsion springs can be dangerous if done improperly.
What You’ll Need
Adjusting torsion springs requires some specialized tools that you may not have around the house. Here are the tools you’ll need:
- Winding bars – These are essentially very long, sturdy metal rods with customized tips to fit the winding cones on the torsion springs. Winding bars allow you to safely adjust the tension of the springs while staying clear of them.
- Vise grips – Standard locking pliers allow you to firmly grip the torsion shaft and keep the springs from spinning while you adjust the tension on them.
- Ladder – A sturdy ladder helps provide safe access to the torsion springs above the garage door. Make sure the ladder is on stable, level ground before climbing.
- Safety cable – This is attached to the torsion shaft to prevent loose springs from spinning uncontrollably if the system fails completely. This provides an extra level of safety.
- Safety cone – This cone is placed over the winding unit while winding bars are engaged, preventing loose springs from coming loose at the winding cone.
- Marking chalk – Chalk allows you to mark the position of the winding cone before adjustment so you can accurately measure adjustments.
- Tape measure – Needed for measuring parts and ensuring even adjustment on both sides.
Having all these tools in good working order will make for a safe and successful torsion spring adjustment job.
How to Adjust Torsion Springs
Once you fully understand how torsion springs work and have all the necessary tools on hand, you’re ready to dive into the adjustment process. Take it slow and steady. Follow these steps to properly adjust your garage door torsion springs:
1. Examine the full assembly
Before adjusting anything, start by visually inspecting the torsion spring assembly above the garage door. Look for any broken or slipping parts, frayed or cracked cables, or damaged springs. Any major damage needs professional repair. If anything looks worn or substandard, replacement may be needed before safe adjustment.
2. Mark the winding cones
With the door fully closed, use chalk to mark the current position of both winding cone assemblies attached to the torsion shaft. This marks the starting point where you’ll measure adjustments. The idea is to have each spring with even tension, so you want to adjust both sides by the same amount around the shaft.
3. Engage the vise grips
With the door still closed, clamp locking pliers firmly on the torsion shaft up against the spring winding cones. This will prevent the shafts from spinning while adjustments are made. Be sure the vise grips are tight and properly locked. Double-check that the door is fully closed before proceeding further.
4. Insert safety cable
Through the hole on the winding cone, thread a strong cable or metal rod that can stop the cone from spinning freely in case the spring breaks. Tie it off securely to prevent the parts from becoming dangerous projectiles if something goes wrong. This safety measure helps contain parts if a total failure occurs.
5. Place safety cones
With winding bars still disengaged, cover each winding unit with a sturdy metal winding cone. This prevents the bars from slipping while engaged with the cones during winding. The cones center the bars properly on the winding unit for safe engagement.
6. Engage winding bars
Insert both winding bars into the winding cone holes with care. Set the bars firmly into the cones, aligning them properly so they sit securely deep inside the cones. Have a steady grip on the bars before proceeding.
7. Begin adjustments
Maintaining a steady grip, slowly turn the winding bars in the appropriate direction to either increase or decrease tension. Many quarter or half turns may be required to achieve proper spring tension. Turn both bars completely in sync with each other to keep the door balanced.
Ideally, the door should be able to rest at any partially open position when properly balanced. If it flies open or closed, further tension adjustments are likely needed. Release the vise grips periodically to check the door balance and operation.
Use small turns and increments to avoid shocking the springs or causing slippage. Reposition the vise grips if needed and measure progress with the chalk marks.
8. Test door operation
Once you believe adequate tension balance has been achieved based on door operation, do a complete test by disengaging the bars and vice grips. Open and close the door fully and time how long it takes to come to rest. The door should move smoothly in both directions. If any issues persist, further adjustments may be needed.
9. Check side clearances
Make sure the door closes fully and has adequate clearance on the sides. If it hits the frame or doesn’t close completely, the springs could still be uneven. Check side clearances and realign the track hardware if needed.
10. Lube the springs
Once adjustments are complete, apply a coating of high-quality machine oil to the springs. This lubes the system, lessens wear, and helps prevent rust buildup. Always lubricate after adjustments.
Be very methodical and cautious when engaging the winding bars, adjusting tension, and releasing the bars. Have assistants as needed to help stabilize ladders and check door operation. Rushes or distractions can easily lead to accidents with torsion spring systems.
Patience and gradual turns go a long way. Keep a record of how many quarter or half turns it took on each side to achieve proper door balance. This makes fine-tuning easier next time, if needed.
Signs Your Torsion Springs Need Adjustment
Some clear signs that your torsion springs need tension adjustment include:
- The door not fully opening or closing
- Very rapid or heavy door motion
- Door drift or sag while in open positions
- Difficulty in lifting or closing the door by hand
- Grinding or rattling noises during the operation
- Uneven door balance side-to-side
Catching spring problems early allows for quick adjustment to restore smooth operation. Ignoring issues can lead to worse spring wear, door panel damage, and broken hardware.
Periodic visual inspection and lubrication help minimize torsion spring adjustments needed over time. But after years of use, most garage doors will inevitably need torsion spring tuning to compensate for metal fatigue.
Why Proper Torsion is Important
Maintaining proper torque in torsion springs is imperative for the safe, long-lasting operation of your garage door. Insufficient tension can cause a number of problems, including:
- The door becoming very hard to lift by hand
- The door sagging or drifting from open positions
- The opener works much harder to open/close the door
- The door not fully opening or closing
- Noisy or grinding operation
Lack of tension basically allows the weight of the door to overpower the counterbalance system. This strains other components and hardware.
Excessive torsion can also be detrimental, causing:
- The door closed too forcefully
- Cables, drums, and tubes wearing prematurely
- Damage to the door panels from impact
- Dangerous uncontrolled door movement
Ideally, the springs should be tensioned just enough the counterbalance the weight of the door through its full range of travel. This allows for smooth, easy, and safe operation.
Safety Concerns
Working with garage door torsion springs is an extremely dangerous endeavor for the DIYer. Significant injury can occur very quickly with these components. Here are some key safety concerns when adjusting torsion springs yourself:
- Overwinding – Excessive torque can overload and break springs, cables, and hardware. Use extreme caution when increasing tension.
- Loose parts – Broken springs or unwinding bars can cause components to whip around wildly causing severe harm.
- Falling items – Unbalanced doors can abruptly slam shut or drop rapidly.
- Incorrect tools – Using makeshift or poor-quality tools leads to slippage and loss of control.
- Poor training – Lack of instruction and practice adjusting torsion springs often ends badly. Seek professional guidance.
- Distractions – Maintain total focus on the springs and bars when adjusting and disengaging. One slip could be disastrous. Never rush.
Working alone is never advisable. Have an assistant ready to call for help if something goes wrong. And be sure to use the safety cable, cones, gloves, and goggles religiously. Never take shortcuts to save a little time when safety is paramount.
If in doubt at any point, stop and call a trained garage door technician. Your safety is most important!
When to Call a Pro

In many cases hiring a professional garage door company to adjust your torsion springs is advisable. Here are some situations when bringing in a pro is your best bet:
- You don’t have the proper tools or training to safely adjust springs yourself
- The springs have become completely de-tensioned and uncoiled
- There is no sign of spring cracking or damage from over-winding
- You need to fully remove and reinstall springs for replacement
- There are multiple issues with cables, bearings, drums, etc.
- You are unable to achieve proper door balance and smooth operation
Professionals have all the right equipment, expertise, and experience to safely service torsion springs and diagnose related problems. They can get the job done quickly and ensure your garage door is in excellent working order.
The small cost of a tune-up and adjustment is money well spent for your safety and getting your door running right again. And you get peace of mind knowing it was fixed properly.
Conclusion
Having to adjust your garage door torsion springs indicates the springs are fatigued and potentially nearing the end of their lifespan. But periodically tuning them allows you to restore smooth, safe operation and get a bit more life out of old springs.
Carefully following the proper procedures for safely adjusting the springs reduces the inherent dangers substantially. Patience and the right tools are key. Don’t attempt adjustments in a rushed or improvised manner.
Focus on small incremental tension changes and checking door operation frequently. Gradually achieve proper spring torque to get your door balanced and opening/closing just right. But know your limits and call in a professional when needed.
Keeping your garage door torsion springs optimally adjusted gives you cost-efficient long-term service. Just be cautious, take it slow, and pay close attention every time you work on these springs. Stay safe!
FAQs
Q: How often should torsion springs be adjusted?
A: Springs should be adjusted whenever the door starts to not fully open/close, bind, or operate very rapidly. This is usually needed every 3-7 years with average use. More frequent lubrication helps minimize adjustments.
Q: Can I adjust just one side of the torsion springs?
A: No, both sides must be adjusted equally and in sync to keep the door balanced side-to-side. Uneven adjustments can damage the door and hardware.
Q: Does the door have to be locked when adjusting springs?
A: Yes, use vise grips or clamps on the torsion shaft to prevent the springs from spinning freely during winding. This avoids uncontrolled movement.
Q: Should sound like popping or grinding halt a torsion spring adjustment?
A: Yes, stop immediately if you hear any loud or strange noises from the springs. This likely signals damage and danger – call a pro before attempting further adjustments.
Q: How many turns are needed to adjust typical torsion springs?
A: The number of quarter or half turns needed varies widely depending on spring size and current tension. Make gradual turns until proper door balance and operation are restored – this usually takes many small adjustments.