If you love making things but hate dragging cords across your workspace, a small cordless rotary tool changes everything. You can carve, sand, polish, clean, and detail-finish projects in minutes—without hauling a full-size drill or setting up a bench grinder. That’s exactly why so many makers keep a compact rotary tool within arm’s reach.
When you want one tool that supports quick fixes and creative projects, this handy DIY rotary kit fits the moment: it targets the everyday tasks that eat time, from smoothing rough 3D prints to touching up paint chips and engraving small gifts. And because it runs on a 4V cordless platform, you can move from garage to kitchen table to craft room without breaking your workflow.
Why a cordless rotary tool belongs in a modern craft setup
A rotary tool earns its keep because it handles “small but annoying” jobs faster than most single-purpose tools. According to industry experts, most DIYers abandon projects at the finishing stage, not the cutting stage—because sanding, deburring, and polishing feel slow. A cordless rotary tool speeds up those last steps and improves results.
You also gain flexibility across materials and project types. You can detail wood signs, clean metal surfaces, grind tiny edges, or buff resin pieces, all with a simple accessory change. Professionals recommend keeping a rotary tool ready for touch-ups because it reduces rework and helps you control fine detail without over-removing material.
What makes the HARDELL 4V cordless approach so practical
A 4V cordless rotary tool focuses on convenience, not brute force. That choice helps in crafts and light DIY, where you value control, portability, and quick start more than heavy grinding. Based on manufacturer guidelines, you’ll get the best performance when you match the accessory to the material and let the tool’s speed do the work instead of pushing hard.
Here’s what a compact cordless design helps you do better:
- Work in tight areas like shelves, model interiors, and small corners
- Reduce setup time because you skip extension cords and outlet hunting
- Maintain steadier control because the tool feels lighter in hand
- Move between tasks quickly, especially during finishing work
If you build gifts, customize decor, or maintain tools, you’ll notice the benefit immediately. You spend more time making and less time preparing.
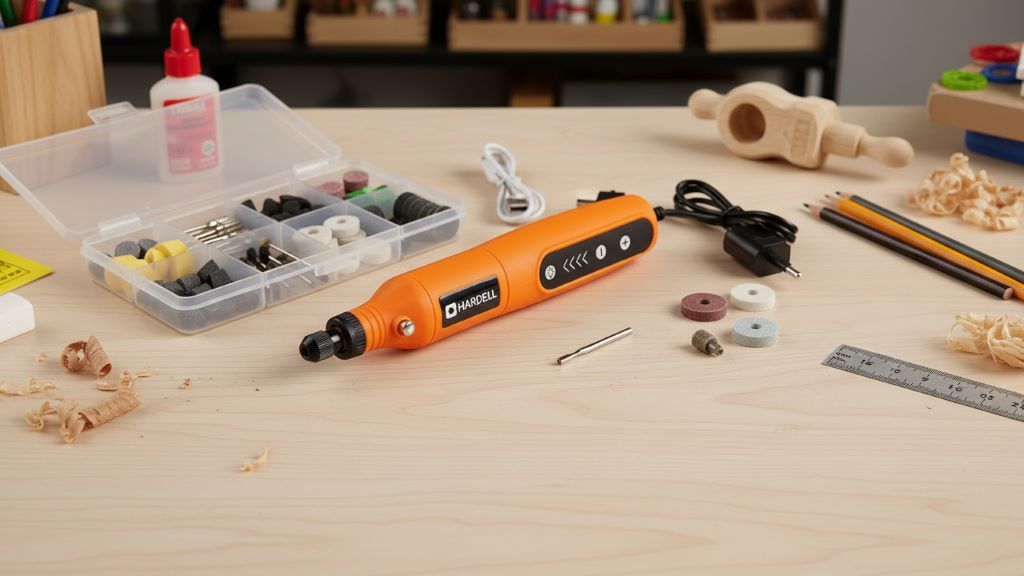
Understanding the HARDELL 4V Cordless Rotary Tool Kit (and what it can realistically do)
A rotary tool shines when you treat it like a precision finisher, not a demolition tool. It excels at shaping, smoothing, cleaning, and detail work. It struggles when you ask it to remove lots of material fast, especially on thick steel or stone.
Core use cases for crafting and light DIY
You can tackle a wide range of tasks with smart accessory choices and steady technique:
- Engraving and etching on wood, glass (with the right bit), acrylic, and coated metals
- Sanding and smoothing wood edges, 3D prints, resin pours, and filler spots
- Polishing metals, epoxy, and jewelry pieces for shine and clarity
- Light cutting and trimming on plastic and thin materials (when the accessory supports it)
- Cleaning and rust removal on small hardware, tools, and decorative pieces
As recommended by professionals, treat rotary work like controlled passes. You improve accuracy when you take multiple light passes instead of one aggressive push.
Where a 4V cordless rotary tool should not serve as your primary tool
You’ll stay happier with your results when you avoid these expectations:
- Heavy metal grinding for long periods
- Deep cutting through thick steel or bolts
- Continuous-duty work that demands high torque like a corded die grinder
According to widely accepted industry standards, you should size your tool to the job. Use the cordless rotary tool for detail and finishing, and keep heavier tools for structural removal.
Key features that matter for real-world crafting
Manufacturers list many specs, but a few practical factors decide whether a rotary tool feels “easy” or “fussy” during projects.
Cordless freedom and quick starts
Cordless power removes friction from your routine. You pick up the tool, do the task, and put it back—no cord management, no outlet planning. That convenience matters most for short tasks like deburring a cut edge, smoothing a resin drip, or polishing a spot before topcoat.
Speed control and material matching
Speed affects heat, control, and finish quality. Faster speeds can burn wood, melt some plastics, or haze acrylic if you linger. Lower speeds help you avoid heat buildup and keep edges crisp.
Use this simple matching guide as a starting point (then adjust by feel):
- Wood sanding and smoothing: medium speed, light pressure
- Plastic trimming and deburring: low-to-medium speed to prevent melting
- Metal polishing: medium speed with polishing compound and gentle contact
- Engraving: medium-to-high speed depending on tip type and surface hardness
Based on manufacturer guidelines, you should test on scrap first. Ten seconds of testing saves you a ruined surface.
Related:
Garden Tools for Elderly or Disabled: A Comprehensive Guide
How to Program Remote to Garage Door Opener Using Household Tools
Ergonomics: comfort equals precision
A compact body helps your hand stay steady during detail work like engraving, inlay cleanup, or model finishing. According to industry experts, fatigue causes most beginner mistakes with rotary tools. When your wrist tires, you press harder, and the bit grabs or skips.
A simple fix helps: stabilize your hands. Rest your forearms on the bench or brace your tool hand with your free hand for controlled strokes.
Getting started fast: setup, accessory changes, and safe handling
Rotary tools feel simple, but beginners often struggle with accessory choice and setup. You can avoid 80% of frustration by following a repeatable workflow.
A quick setup checklist for first-time users
- Charge the tool fully before the first long session
- Choose the accessory that matches your goal (sand, polish, engrave, clean)
- Confirm the accessory seats straight and tight before powering on
- Test on scrap material and adjust speed before touching the final piece
- Wear eye protection and tie back hair or loose sleeves
Professionals recommend eye protection even for “tiny” jobs, because sanding drums and cut-off wheels can throw grit fast.
Accessory selection: how to pick the right bit without guessing
You don’t need dozens of bits to start—you need the right categories:
- Sanding drums for shaping and smoothing
- Grinding stones for minor shaping and edge cleanup
- Polishing wheels for shine and finishing
- Engraving tips for lettering and detail lines
- Wire brushes for cleaning metal and removing oxidation
When you feel unsure, ask one question: “Do I want to remove material or refine the surface?” Choose sanding/grinding for removal and polishing for refinement.
Safety habits that improve results (not just protection)
Safety practices also improve your finish quality:
- Hold the tool like a pen for engraving and detail control
- Use light pressure so the accessory spins freely and cuts cleanly
- Keep the accessory moving to avoid heat spots and gouges
- Clean residue off bits so they cut consistently
I also keep a small bench checklist () next to my mat so I don’t skip eye protection when I “only need a quick touch-up.”
Practical projects you can do this weekend
The best way to learn a rotary tool involves small projects with clear success criteria. These ideas build skill fast while creating something useful.
Engrave personalized gifts (wood, metal tags, acrylic)
You can engrave initials, dates, and short messages on:
- Wooden keychains or small plaques
- Coated metal tags
- Acrylic ornaments and desk signs
Tips that improve your lettering:
- Print a template and tape it under clear acrylic as a guide
- Trace lightly first, then deepen the lines on a second pass
- Use consistent stroke direction for a cleaner look
According to industry experts, most engraving mistakes come from rushing curves. Slow down on corners and lift slightly at the end of each stroke.
Restore and polish small metal items
A rotary tool helps you refresh dull hardware and decorative pieces like hinges, handles, and small tools.
A simple polish workflow:
- Clean the surface with a degreaser and dry it
- Remove light oxidation with a gentle brush or abrasive accessory
- Polish using a soft wheel and a tiny amount of compound
- Wipe clean and repeat until you reach the shine you want
As recommended by professionals, use minimal compound. Too much compound loads the wheel and smears instead of polishing.
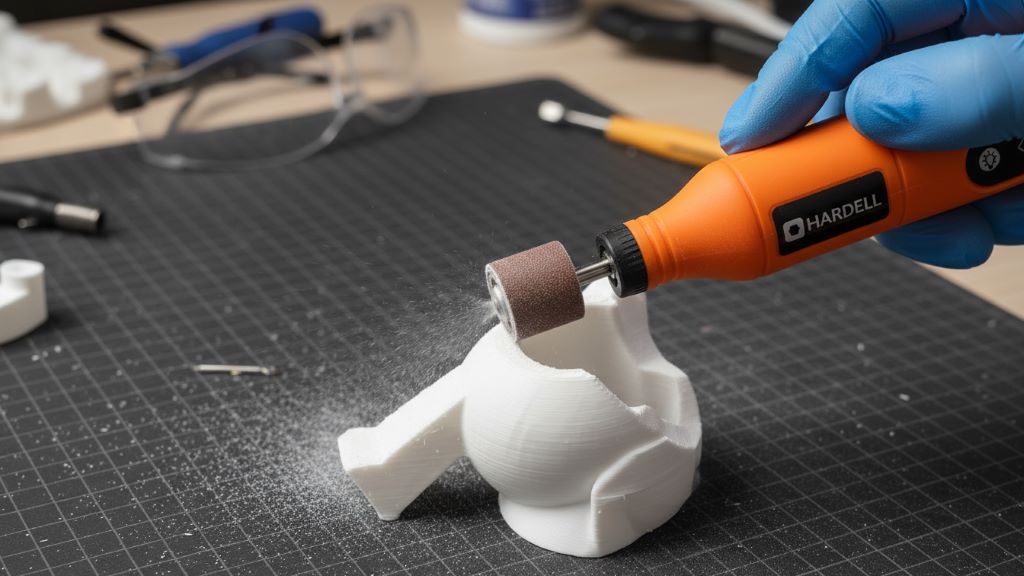
Smooth and finish 3D prints and resin crafts
A cordless rotary tool can speed up post-processing on prints and resin projects:
- Knock down support marks and seam lines
- Round sharp edges for a more finished feel
- Polish clear resin pieces for better clarity (after sanding steps)
Keep heat under control by using lighter pressure and taking breaks. Plastic and resin respond best to patience.
Quick home fixes: screws, burrs, and tight spaces
You’ll find endless uses during routine maintenance:
- Remove burrs after cutting zip ties or trimming plastic parts
- Clean corrosion from battery contacts (carefully and lightly)
- Shape small shims or smooth wood splinters on furniture edges
According to widely accepted industry standards, you should avoid using rotary tools near flammable vapors and always maintain good ventilation during sanding or polishing.
Techniques that make your work look “pro,” even as a beginner
Skill matters more than tool price when it comes to rotary finishing. These techniques improve outcomes immediately.
Use the “three-pass rule” for clean finishes
Instead of trying to finish in one go:
- Rough pass: remove the obvious high spots
- Refining pass: even out the surface and correct shape
- Finishing pass: polish or fine-sand for the final look
This approach prevents accidental gouges and keeps lines crisp.
Let the accessory do the cutting
If you push hard, you create chatter marks, heat, and uneven edges. Professionals recommend a feather-light touch, especially on plastics and soft woods. You should hear a steady, smooth sound, not a strained motor.
Protect the surface around your work
Masking tape helps you avoid accidental slips during engraving or sanding. Tape also gives you a visual boundary line, which improves symmetry.
Maintenance and care for long-term performance
A cordless rotary tool lasts longer when you keep it clean and store it thoughtfully.
Simple maintenance habits
- Brush off dust after each session so vents stay clear
- Wipe accessories before storage to reduce buildup
- Replace worn sanding bands early to avoid burn marks
- Store bits in a small organizer so you don’t bend shafts
Based on manufacturer guidelines, you should stop using accessories that wobble, crack, or deform. A damaged accessory vibrates and reduces control.
Battery and charging best practices
Even small batteries benefit from smart routines:
- Charge before long sessions instead of topping up after every tiny task
- Let the tool cool after heavy use before charging
- Store in a moderate-temperature area for better battery health
According to industry experts, heat causes many early battery performance issues in compact cordless tools.
FAQs
What can I realistically do with a 4V cordless rotary tool?
You can sand, polish, engrave, clean, and detail-finish many materials. You’ll get the best results on small-to-medium tasks where control matters more than torque.
Can I use it for wood carving?
Yes, you can carve shallow details and refine shapes, especially on softwoods. As recommended by professionals, you should take light passes and avoid forcing deep cuts, which can cause skipping.
Will it work on metal?
You can clean, polish, and do light grinding on metal. For heavy grinding or cutting thick metal, you should use a higher-power tool designed for that workload.
How do I stop plastic from melting while sanding?
Lower the speed, reduce pressure, and keep the accessory moving. You can also pause often to let the material cool, which prevents smearing and edge roll.
What’s the easiest beginner project?
Engrave a wooden keychain or smooth and polish a small resin piece. These projects teach control, speed adjustment, and finishing without demanding aggressive material removal.
How do I choose the right accessory?
Start with your goal: remove material (sanding/grinding) or refine the surface (polishing). According to widely accepted industry standards, you should test on scrap material before you commit to the final piece.
Do I need safety gear for small jobs?
Yes. Professionals recommend eye protection for all rotary tool work because debris can fly unexpectedly, even at low speeds. You should also manage dust with ventilation or a mask during sanding.
Conclusion: Make more, struggle less
When you build, repair, and customize things regularly, you need tools that reduce friction in your process. The HARDELL 4V Cordless Rotary Tool Kit supports exactly that kind of everyday making: quick touch-ups, cleaner finishes, and more creative freedom without cord clutter.
If you want crafting to feel easier—and you want projects to look more finished—set up a small rotary-tool station, practice on scrap for 15 minutes, and start with one simple project this week. You’ll gain speed and confidence faster than you expect.