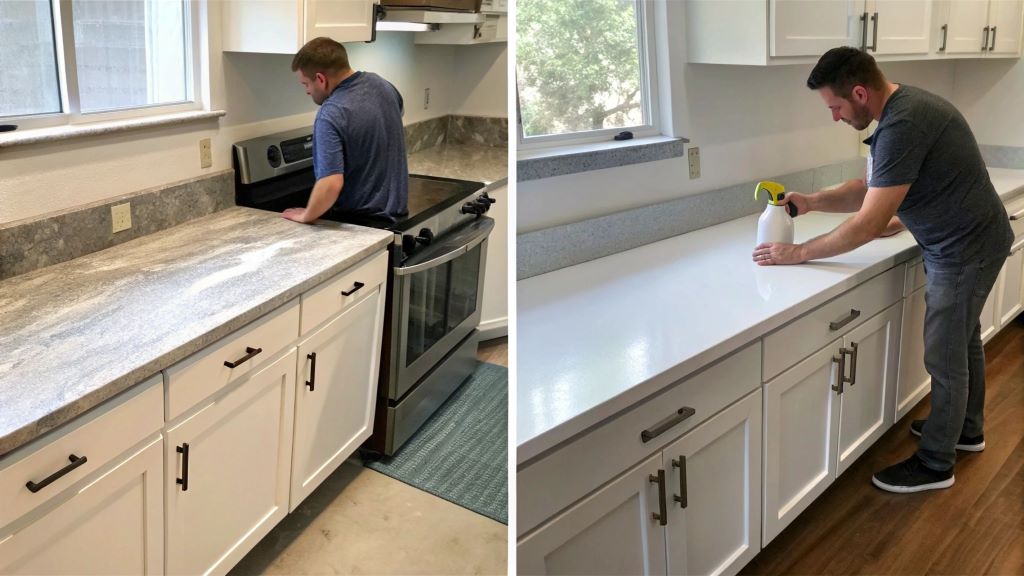
Transforming your kitchen doesn’t always require a complete renovation. Sometimes, a simple update can make a dramatic difference. Laminate countertops, while budget-friendly and durable, can start to look dated over time. However, with the right approach and materials, you can give them a fresh new appearance that rivals expensive stone surfaces. The experts at Sherwood Blog have helped thousands of homeowners achieve stunning kitchen makeovers through creative DIY solutions.
Painting laminate countertops has become increasingly popular among homeowners seeking cost-effective kitchen updates. This technique offers an affordable alternative to full countertop replacement, typically costing less than $100 compared to thousands for new materials. Additionally, the process can be completed over a weekend, making it perfect for busy schedules.
Understanding how to paint laminate countertops properly ensures long-lasting, professional-looking results. The key lies in thorough preparation, selecting the right products, and following proper application techniques. With patience and attention to detail, even beginners can achieve remarkable transformations.
Understanding Laminate Countertops and Their Challenges
Laminate countertops consist of multiple layers pressed together under high heat and pressure. The top layer features a decorative paper pattern sealed with melamine resin, creating a smooth, non-porous surface. This smooth finish, while easy to clean, presents unique challenges when painting.
The primary obstacle is adhesion. Most paints struggle to bond properly with laminate’s slick surface. Therefore, proper surface preparation becomes crucial for success. Additionally, laminate can expand and contract with temperature changes, requiring flexible paint formulations.
Understanding these characteristics helps explain why standard latex paint often fails on laminate surfaces. However, specialized primer and paint systems have been developed specifically to overcome these challenges. These products create mechanical bonds through surface etching and chemical adhesion.
Essential Materials and Tools for Success
Before starting your project, gather all necessary materials and tools. Quality preparation prevents frustration and ensures better results. The investment in proper materials pays dividends in durability and appearance.
Essential materials include deglosser or fine-grit sandpaper, bonding primer designed for slick surfaces, high-quality paint suitable for countertops, and protective topcoat. Additionally, you’ll need painter’s tape, drop cloths, cleaning supplies, and application tools.
For tools, collect high-quality brushes, foam rollers, paint trays, mixing sticks, and measuring tools. Professional-grade equipment produces smoother finishes and reduces visible brush marks. Furthermore, having backup brushes prevents project delays if tools become damaged.
Preparing Your Workspace and Countertops
Proper preparation determines project success more than any other factor. Start by removing all items from countertops and surrounding areas. Cover nearby surfaces, appliances, and floors with plastic sheeting or drop cloths. Good ventilation is essential, so open windows and use fans if possible.
Next, remove or tape off fixtures like faucets, soap dispensers, and electrical outlets. This attention to detail prevents accidental paint coverage on unwanted surfaces. Moreover, it allows for cleaner, more professional-looking results.
Clean countertops thoroughly with degreasing cleaner to remove soap residue, cooking oils, and other contaminants. Even microscopic residues can prevent proper paint adhesion. Therefore, take time to clean all surfaces, including edges and backsplash areas. Allow surfaces to dry completely before proceeding.
Surface Preparation Techniques
Surface preparation is the foundation of any successful painting project. Begin by lightly sanding all surfaces with 150-grit sandpaper. This process, called scuffing, creates microscopic scratches that help paint adhere better. Sand in circular motions, applying gentle, even pressure.
Alternatively, use liquid deglosser, which chemically etches the surface without physical abrasion. Apply deglosser with lint-free cloths, working in small sections. Follow manufacturer’s instructions carefully, as application times vary between products. However, always ensure adequate ventilation when using chemical products.
After sanding or deglossing, wipe surfaces clean with tack cloths to remove all dust particles. Even tiny particles can create bumps and imperfections in the final finish. Therefore, thorough cleaning at this stage prevents future touch-ups and ensures smooth results.
Choosing the Right Primer and Paint
Selecting appropriate primer and paint systems is crucial for long-term success. Bonding primers specifically designed for laminate surfaces provide superior adhesion compared to standard primers. These specialized products contain additives that chemically bond with smooth surfaces.
For paint, choose high-quality acrylic or epoxy-based formulations designed for high-wear surfaces. Kitchen and bathroom paints offer enhanced durability and moisture resistance. Additionally, consider paint with built-in primer for simplified application, though separate primer often provides better results.
Color selection impacts both appearance and practicality. Lighter colors hide minor imperfections better than dark shades. However, darker colors can create dramatic, sophisticated looks when applied properly. Consider your kitchen’s lighting and existing color scheme when making final decisions.
Step-by-Step Application Process
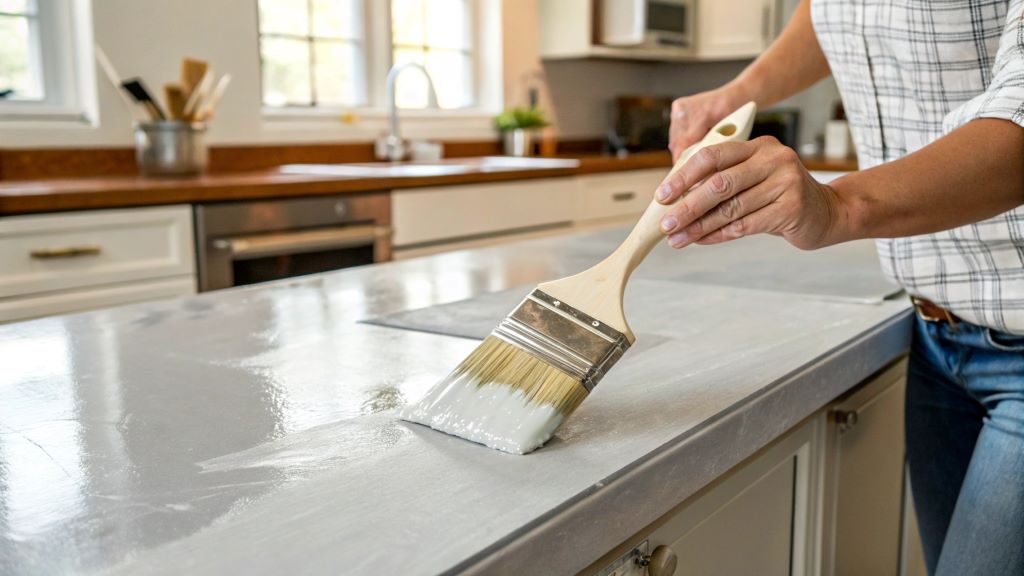
Begin application by stirring primer thoroughly according to manufacturer’s instructions. Apply primer in thin, even coats using high-quality brushes or foam rollers. Work systematically across the surface, maintaining wet edges to prevent lap marks. Allow primer to dry completely between coats.
Most projects require two primer coats for optimal coverage and adhesion. However, highly patterned or dark laminates may need additional coats. Light sanding between coats with fine-grit paper can improve smoothness, but remove all dust before applying subsequent coats.
After primer cures completely, apply paint using similar techniques. Multiple thin coats produce better results than fewer thick coats. Therefore, plan for at least two paint coats, possibly three for solid color coverage. Maintain consistent application patterns and avoid overworking areas that begin to tack up.
Finishing Touches and Protective Coatings
Once paint has cured according to manufacturer’s specifications, consider applying protective topcoats for enhanced durability. Polyurethane or acrylic topcoats provide additional protection against scratches, stains, and daily wear. However, ensure compatibility between paint and topcoat systems.
Apply topcoats using the same careful techniques used for primer and paint. Multiple thin coats provide better protection than single thick applications. Additionally, light sanding between topcoat applications can improve adhesion and smoothness.
Allow full cure time before returning items to countertops or resuming normal use. Cure times vary significantly between products, ranging from days to weeks for complete hardness. Therefore, patience during this phase prevents damage to your newly finished surfaces.
Maintenance and Longevity Tips
Proper maintenance extends the life of painted countertops significantly. Use cutting boards for all food preparation to prevent knife marks and scratches. Additionally, place hot pots and pans on trivets or hot pads to prevent heat damage. These simple precautions preserve the finish’s integrity.
Clean surfaces regularly with mild soap and water, avoiding abrasive cleaners or scrubbing pads. For stubborn stains, use baking soda paste applied gently with soft cloths. However, aggressive cleaning can damage the paint finish, requiring premature touch-ups or refinishing.
Inspect surfaces periodically for chips, scratches, or wear patterns. Address minor damage quickly with touch-up paint to prevent water infiltration and further deterioration. Therefore, keeping leftover paint for future maintenance proves invaluable for long-term success.
Troubleshooting Common Issues
Even careful preparation can’t prevent all potential problems. Poor adhesion often results from inadequate surface preparation or contamination. If paint peels or chips shortly after application, strip affected areas and restart with more thorough preparation. Additionally, ensure all cleaning residues are completely removed before painting.
Brush marks or roller stipple can mar otherwise successful projects. These issues typically result from using low-quality tools or incorrect application techniques. Therefore, invest in professional-grade brushes and rollers designed for smooth finishes. Practice technique on test surfaces before working on actual countertops.
Color consistency problems may arise when using multiple paint containers. Mix all paint together in larger containers before application to ensure uniform color throughout the project. However, if color variations occur, light sanding and additional coats can often correct the issues.
Cost Analysis and Return on Investment
Painting laminate countertops offers exceptional value compared to replacement options. Material costs typically range from $50 to $150, depending on surface area and product quality. Labor costs are eliminated for DIY projects, creating substantial savings over professional installation of new countertops.
Compare these costs to replacement options: new laminate countertops cost $500 to $2,000 installed, while stone surfaces range from $2,000 to $8,000 or more. Therefore, painting provides remarkable return on investment, especially for homeowners planning future renovations or selling soon.
Additionally, the skills learned during countertop painting transfer to other home improvement projects. Many homeowners discover newfound confidence in tackling additional DIY challenges. However, consider time investment alongside monetary savings when evaluating project feasibility.
Frequently Asked Questions
Can I paint over any type of laminate countertop? Most laminate surfaces can be painted successfully with proper preparation and materials. However, heavily textured or damaged laminates may require additional preparation or may not be suitable candidates. Smooth, intact surfaces provide the best foundation for painting projects.
How long do painted laminate countertops last? With proper preparation, quality materials, and regular maintenance, painted laminate countertops can last 3-5 years or longer. Durability depends largely on usage patterns, maintenance habits, and quality of initial application. High-traffic kitchens may require more frequent touch-ups or refinishing.
What type of paint should I use for countertops? Use high-quality acrylic or epoxy-based paints specifically designed for high-wear surfaces. Avoid standard wall paints, which lack the durability needed for countertop applications. Kitchen and bathroom paints offer enhanced moisture and stain resistance suitable for countertop use.
Do I need to sand laminate countertops before painting? Light sanding or chemical deglossing is essential for proper paint adhesion. This process creates surface texture that helps paint bond mechanically with the smooth laminate surface. Skip this step at your own risk, as paint failure is likely without proper surface preparation.
Can painted countertops be repaired if damaged? Yes, painted surfaces can be touched up or refinished as needed. Keep leftover paint for future repairs, and address damage promptly to prevent water infiltration. Minor scratches and chips can often be repaired with careful touch-up work, while larger damage may require section refinishing.
Conclusion
Painting laminate countertops offers an affordable, achievable path to kitchen transformation. Success depends on thorough preparation, quality materials, and patient application techniques. While the process requires time and attention to detail, the results can rival expensive countertop replacements at a fraction of the cost.
The key elements for success include proper surface preparation, appropriate primer and paint selection, and careful application techniques. Additionally, realistic expectations and commitment to proper maintenance ensure long-lasting, beautiful results. With these fundamentals in place, even novice DIYers can achieve professional-looking countertop makeovers.
Therefore, consider this cost-effective option before committing to expensive countertop replacement. However, remember that painted surfaces require more maintenance than solid surface materials. When approached with proper preparation and realistic expectations, painted laminate countertops provide excellent value and satisfaction for budget-conscious homeowners.
Read More:
How to Make a Backdrop Stand for Pictures
Keeks Design Reviews: An In-Depth Look at the Popular Eames Replica Chairs