A spin mop is a popular cleaning tool that makes mopping floors quick and easy. It consists of a mop head that attaches to a spinning mechanism on a long pole. The spinning motion wrings out the mop head so you don’t have to kneel down and do it manually, allowing you to clean large areas efficiently.
Over time, spin mop heads can get dirty, worn out, and less effective at cleaning. When this happens, you need to know how to remove and replace the old mop head with a new one. Here is a step-by-step guide on how to remove spin mop head.
Why You May Need to Remove the Mop Head
There are a few reasons why you may need to remove your spin mop head:
- The mop head is dirty. After repeated uses, grease, dirt, and grime can build up on the mop head fibers. This affects its cleaning performance. Replacing it restores the mop’s cleaning power.
- The mop head is worn out. With regular use, the fibers become frayed and start falling out, rendering the mop less effective at scrubbing floors. Putting on a new head brings the mop back to optimal condition.
- You want to use a different mop head. Spin mops often come with different types of interchangeable mop heads for various cleaning tasks. For example, swap out a scrub brush head to clean tough stains. Being able to change the heads gives you more versatility.
- It’s damaged. Accidents happen – mop heads can get torn or warped. It’s best to replace damaged heads so you can mop safely and efficiently again.
Knowing when to replace your mop head ensures your floors get thoroughly cleaned each time you mop.
How to Remove the Mop Head
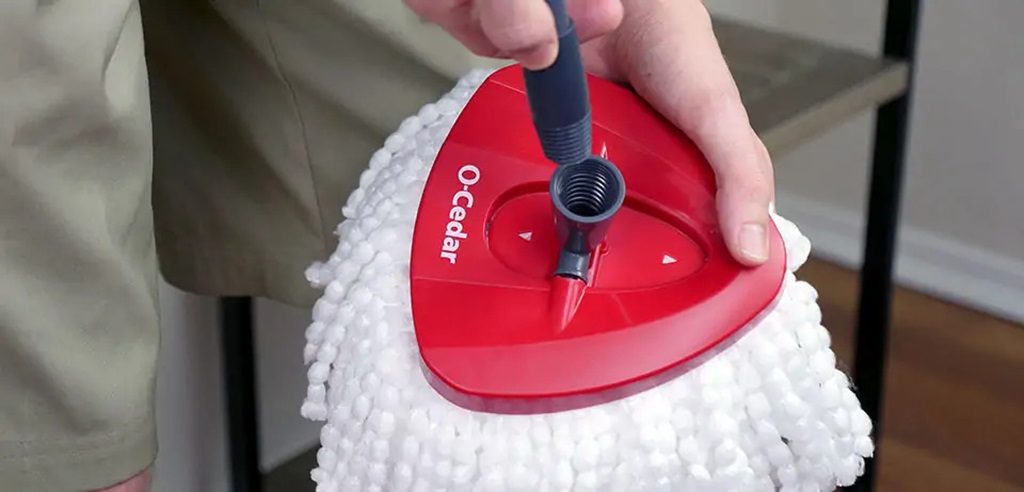
Removing a spin mop head is a quick and straightforward process. Here are the step-by-step instructions:
Step 1: Unplug the Mop
If your spin mop is electric, you first want to unplug it from the wall outlet. This ensures the mop doesn’t accidentally turn on while you’re changing the head.
For safety, also turn off and unplug any batteries or rechargeable mechanisms. Better to be safe than sorry!
Step 2: Locate the Release Button or Locking Mechanism
The mop head attachment usually has a release button or sliding lock mechanism. The location varies by mop model, but it’s often found on the top or side of the unit.
Consult your spin mop’s instruction manual if you are unsure where this release mechanism is.
Step 3: Press the Release Button
Once you’ve located the release button or switch press and hold it down. This unlocks the mop head so it detaches easily.
Don’t be afraid to apply some pressure when pushing the button. It can sometimes get stuck after months of use.
As you press, gently wiggle or rock the mop head back and forth. This helps dislodge it from the locked position.
Step 4: Slide the Mop Head Off
With the release button depressed, slide the mop head downward off the pole with your other hand.
Wiggling it from side to side helps it come off easier. It may take some wiggling if it’s been stuck there for a while. But be patient and work it off gently.
For mops with a locking mechanism (like a sliding collar), slide the lock into the open position rather than pressing a button. The mop head can then be slid off.
Step 5: Remove Any Remaining Strands
Examine the mop pole and look for any strands of fiber, dirt, or debris left over from the old mop head. Pull these off and discard them.
You want a nice clean pole, so the new mop head locks into place tightly. Any debris could prevent a snug fit.
And there you go – with just five quick steps, that old spin mop head is removed and ready to be replaced!
What Type of Mop Head to Use
Spin mops come with a few standard interchangeable head designs:
- Chenille microfiber mop heads – Made from microfiber arranged in dense, shaggy piles. The ultra-fine fibers grab dirt and dust quickly. Great for everyday mopping.
- Loopy mop heads Consist of large textured yarn loops that scrub tough dried-on spills. They are ideal for heavy-duty cleaning.
- Scrub brush mop heads – Firm nylon bristles get into grout lines and scrub off stubborn grime. They are perfect for tile floors.
- Wet mop heads – Highly absorbent, sponge-like cotton heads for soaking up spills and liquids.
- Dry dusting mop heads – Electrostatic microfiber attracts and traps dust and allergens. Great for quick dry touch-ups.
Choose the mop head type that best suits your cleaning needs. The packaging or product listings will indicate which floor surfaces they work best on.
Many mops come with 2-3 interchangeable heads so you can tackle various cleaning tasks. Rotate heads as they wear out to prolong the mop’s lifespan.
How to Attach a New Mop Head
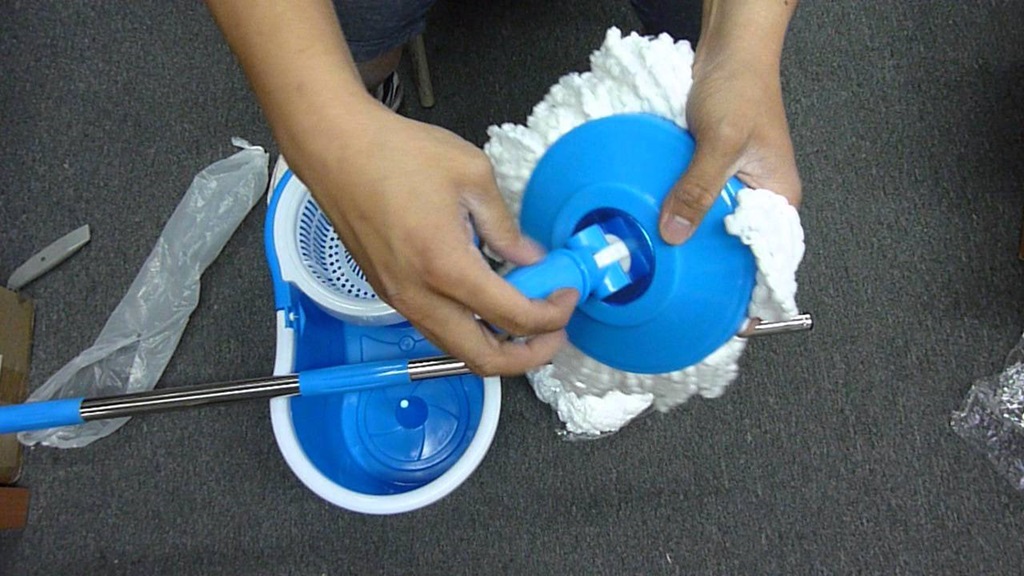
Putting on a new spin mop head is as easy as removing the old one. Just follow these instructions:
Step 1: Select Your New Mop Head
Grab the fresh mop head that matches your mop brand from its packaging. Please give it a quick inspection for any defects or flaws.
Step 2: Align the Head with the Pole
Orient the mop head so the attachment side lines up with the pole opening. Make sure all the locking tabs or mechanisms are facing the right way.
Step 3: Slide It On
Push and wiggle the mop head onto the pole until it slides on. You may need to twist it around to align the locking system.
Step 4: Secure the Locking Mechanism
Once seated on the pole, engage the mop head locking system so it clicks or snaps securely into place. Consult your mop manual for how your specific lock works.
Give an experimental tug on the mop head to verify that it’s firmly attached. If it wiggles loose, slide it off and reattach until it locks tight.
Step 5: Plug In the Mop (If Electric)
If you have an electric spin mop, plug it back into the wall outlet once you’ve confirmed the new mop head is installed correctly.
And that’s it – you’ve given your spin mop a fresh new head. It’s now ready to tackle all your mopping tasks with ease. Just add your preferred cleaning solution and get scrubbing those floors!
Tips for Making Your Mop Heads Last
Here are some handy tips to extend the lifespan of your spin mop heads:
- Rinse mop heads after each use to prevent dirt and grime buildup in the fibers. Avoid long-term soaking.
- Allow mop heads to air dry thoroughly before storing to prevent mildew growth.
- Hand wash gentle microfiber mop heads instead of machine washing to reduce wear and tear.
- Wash scrubby mop heads alone to prevent loops and bristles from snagging on other items. If needed, use a laundry bag.
- Replace heavily soiled mop heads sooner rather than trying to over-clean them. They become less effective when extremely dirty.
- Have 2-3 mop heads on hand to rotate as they wear out.
- Check mop heads for rips, tears, and missing fibers and replace them as needed. Don’t use frayed heads.
- Store mop heads outside direct sunlight and away from heat to avoid damage.
With proper care, a good spin mop head should last 3-6 months with regular use. But remember to inspect it periodically and replace it as soon as it appears worn. Keeping fresh mop heads on hand makes home cleaning hassle-free!
Summary and Conclusion
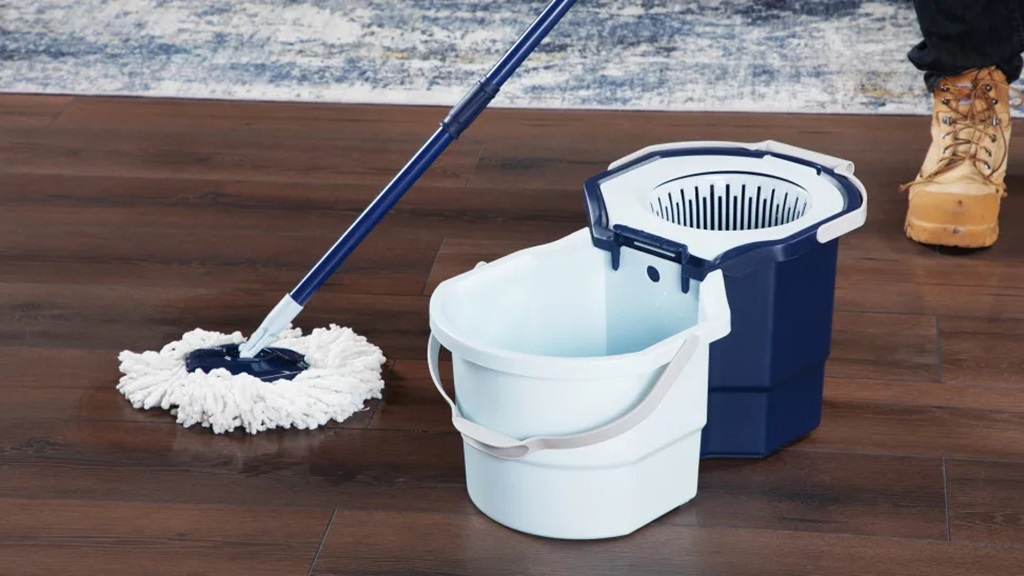
Spin mops make quick work of floor cleaning thanks to their spinning design and interchangeable heads. But the mop heads get soiled and worn over time and must be removed.
Removing an old spin mop head is a simple 5 step process:
- Unplug the mop
- Locate the release button
- Press the button while wiggling off the head
- Slide mop head off pole
- Remove any debris
Then, select a new mop head, align it properly, and slide it on until it clicks into place securely.
Caring for your mop heads by rinsing, washing, and drying them properly extends their lifespan. But expect to swap them out every 3-6 months for optimal cleaning performance.
Keeping extra mop heads on hand means you can replace them when needed. Follow this guide to remove and replace spin mop heads with confidence. Your floors will be sparkling clean in no time!
Frequently Asked Questions About Spin Mop Heads
Here are answers to some common questions about removing and replacing spin mop heads:
How do I know when to change my spin mop head?
Replace it when the fibers appear frayed, worn down, or falling out. Also, change it if it’s filthy or stained despite washing. The lack of cleaning power is another sign it’s time for a new head.
Where can I buy replacement mop heads?
Replacement heads are sold at superstores, hardware stores, online retailers, and the original mop manufacturer’s website. Check that it’s compatible with your mop model.
How often should the mop head be changed?
With regular use, most need replacing every 3-6 months. Scrubbyheads may need swapping out more often.
How do I clean my spin mop head?
Rinse well after each use for a deeper clean, handwash gentle microfiber heads with mild detergent and water. Scrub brushes and loopy heads can go in the washing machine on a gentle cycle in a laundry bag. Avoid bleach or fabric softener.
Why is my new mop head leaving streaks and lint?
This is common with microfiber heads and will improve after a few uses. Make sure to rinse away any manufacturing residues before first use. Washing it can also help eliminate lint shedding and streaking.
Can I use homemade solutions in my spin mop?
You can use diluted natural cleaning solutions like vinegar, Castile soap, hydrogen peroxide, etc. Avoid harsh chemicals that could degrade the mop fibers. Always rinse the head well after using home mixtures.
How do I get rid of the odor in my spin mop?
Rinse heads thoroughly after each use and allow them to air dry fully. If smells persist, soak in an oxygen cleaner or a diluted bleach solution, then rinse well. Replacing the head is recommended if odors remain.
Can I put my spin mop head in the dryer?
No, heat can damage most mop heads. Allow them to air dry instead of fully. Any moisture left behind could breed mold or mildew.
And there you have it – everything you need to know about removing and replacing your spin mop head! With the proper techniques, it’s a quick and easy process. Maintaining fresh mop heads is critical for sparkling floors.


