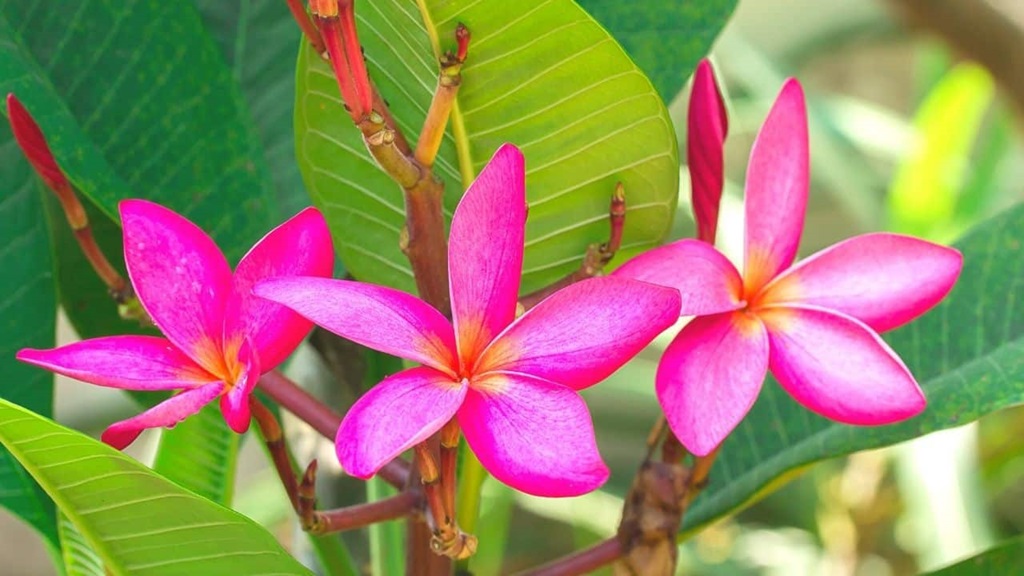
Plumeria, or frangipani, is a tropical flower known for its fragrant, lovely blooms. If you’re interested in learning how to plant plumeria cuttings, there are a few steps you can follow to increase your chances of success. First, choose a healthy cutting that is at least 12 inches long and has a few leaves on it. Then, let the cutting dry out in a shaded area for a few days to promote callusing. Once callused, plant the cutting in a pot filled with well-draining soil and water thoroughly. Place the pot in a warm, sunny area and keep the soil moist but not waterlogged. With proper care, your plumeria cutting should start to grow roots and eventually sprout new leaves and flowers.
While plumerias can be grown from seed, the most reliable propagation method is taking and rooting cuttings from an existing plant. Rooting plumeria cuttings is a straightforward process that anyone can do at home. Plumeria cuttings can develop into mature, flowering plants with proper care and optimal conditions in just a few months!
When to Take Plumeria Cuttings
The best time for taking plumeria cuttings is during the active growing season, spring through fall. Plumeria produces the most robust growth and cuttings root most readily during the warmer months.
Early to mid-spring is an ideal time to start plumeria cuttings. This gives the new plants ample time to develop roots before the summer heat. Taking cuttings after your plumeria has been actively growing for a few months is also a good idea. The new growth will root more successfully than older, dormant wood.
You can continue taking plumeria cuttings into the fall. Just be sure to get cuttings propagated at least 8-12 weeks before your first expected frost so they have time to establish. Slow down taking cuttings in late fall so plants can harden off for winter dormancy.
Choosing the Right Cuttings
Picking the suitable cuttings is an essential first step for success in growing plumeria from cuttings. Follow these tips for selecting optimal plumeria cuttings:
- Select new growth: Choose new, flexible, green tip growth with newly emerging leaves. New-growth roots are far better than old, hardened wood.
- Look for healthy stems: Opt for cuttings from healthy, vigorous parts of the plant that show no signs of disease or damage.
- Cut 6-12 inches below a node: For best results, make the cutting at least 6 inches long but no more than 12 inches. Cut right below a node or junction where leaves emerge.
- Take 3-6 cuttings per plant: Removing 3-6 tip cuttings from a plumeria plant won’t harm it. But don’t overdo it or excessively prune any one plant.
- Time it right: Take cuttings when plants are actively growing but well-watered. Avoid peak heat of the day.
How to Make Plumeria Cuttings
Follow these simple steps for taking plumeria cuttings correctly:
Step 1: Sterilize Your Cutting Tool
Before taking plumeria cuttings, wipe pruning shears or knife with rubbing alcohol to sterilize the blade. This prevents the transmission of diseases between plants.
Step 2: Identify New Growth & Make The Cut
Select a stretch of new, green growth about 6-12 inches long. Using your sterilized, sharp cutting tool, cut the stem immediately below a node or leaf junction.
Step 3: Trim Remaining Leaves
Trim off any remaining leaves from the lower half of the cutting using clean scissors or shears. This reduces transpiration and helps prevent rotting.
Step 4: Dip Cut End in Rooting Hormone
Dip the freshly cut end of the plumeria cutting in rooting hormone powder and tap off any excess powder. The hormone promotes faster root development.
Step 5: Optional – Make a Small Cut on One Side
You can make a shallow 1-inch vertical slit on one side of the cutting to increase the cambium area exposed. This is optional but helps roots develop.
Step 6: Place Cutting in Water
Put the prepared cutting in a glass of clean, room-temperature water. Please place it in bright, indirect light and change the water every few days.
How to Root Plumeria Cuttings
Rooting plumeria cuttings is a simple process. Here are some tips for optimal success:
- Use warm, clean water: Change out the water every 2-3 days. Use room temperature filtered or distilled water.
- Provide bright, indirect light: Plumeria cuttings root best with plenty of warmth and light. A spot with filtered southern or eastern sun is ideal.
- Keep it warm: Maintain temperatures between 70-85°F. Extra bottom heat can accelerate rooting. Keep cuttings away from cold drafts.
- Allow 4-8 weeks for roots: Check for root formation after four weeks. Cuttings can take up to 8 weeks to be fully rooted and ready to pot up.
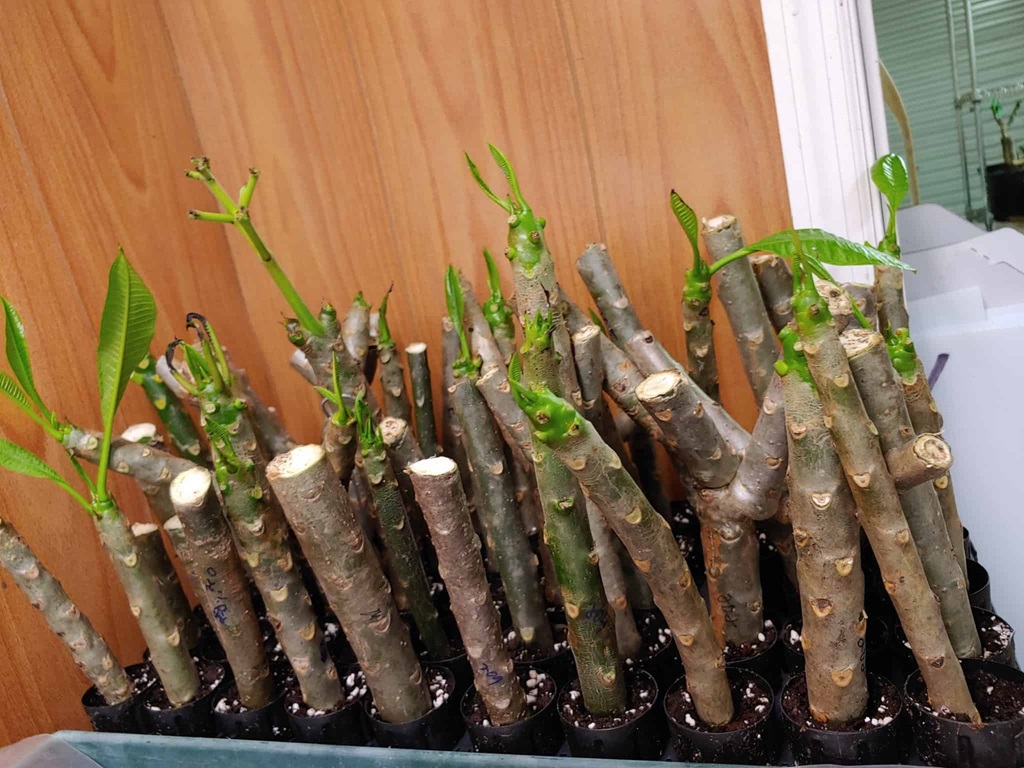
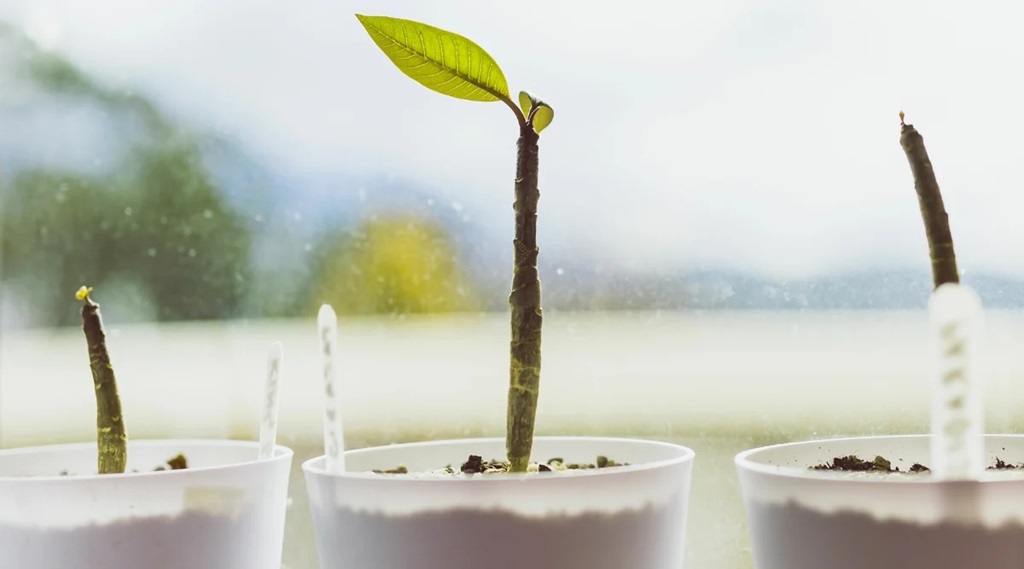
- Look for new growth: New leaf buds indicate your cutting is rooting and establishing. But roots will form before you see top growth.
- Pot up once firmly rooted: Plant in well-draining soil once the cutting has developed a robust root system about 2-3 inches long.
With proper care, most plumeria cuttings will root within two months. Be patient, keep them warm, and keep the water fresh and clean.
Potting Up Plumeria Cuttings
Once your plumeria cuttings have rooted, they can be transplanted into pots and grown on. Follow these tips when potting up rooted plumeria cuttings:
Choose the Right Pot
Select a container with drainage holes 2-4 inches wider than the cutting’s root ball. A 6-inch pot is ideal for recently rooted cuttings. Terra cotta provides excellent aeration.
Use a Loose, Fast-Draining Soil Mix
Plumerias need porous soil that drains well. A good potting mix contains equal parts:
- Coarse sand or perlite
- Peat moss or coco coir
- Compost, worm castings, or manure
You can also use a quality commercial cactus/citrus soil mix.
Plant at the Same Depth as Before
Gently remove the cutting from the water and tease apart the roots. Plant it at the same soil depth it was growing at previously. Firm the soil gently and water well.
Acclimate Before Moving Outdoors
Keep newly potted cuttings indoors for 10-14 days to transition them before moving outside. Avoid direct sun at first.
Gradually Expose to More Sun & Wind
Slowly introduce potted plumeria cuttings to outdoor conditions over 2-3 weeks. This hardens them off for the growing season.
With time and adjustment, your potted plumeria cuttings will thrive outdoors all summer!
Caring for Plumeria Plants
Growing plumeria from cuttings is easy. The more significant challenge is providing the proper care as the plants mature. Here are some essential plumeria plant care tips:
Provide Lots of Sunlight
Plumeria needs full sun to look and grow its best. Provide at least 6 hours of direct sunlight per day. A sunny south or west-facing location is ideal.
Water Thoroughly Only When Dry
Plumerias are succulents and don’t like overly moist soil. Allow the soil to dry 1-2 inches down between waterings. Then, soak the entire root zone until water drains from the bottom.
Use a Fast-Draining Cactus/Citrus Mix
Good drainage is critical! Repot in a soil mix made for cacti and citrus. Add extra perlite or sand to improve drainage if needed.
Fertilize Every 2-3 Weeks During Growth
Feed plumeria with a balanced liquid fertilizer from spring through fall during the active growing season. Stop fertilizing once plants become dormant in winter.
Prune Selectively in Spring
In spring, assess plants and selectively remove crossing, damaged, or diseased branches. Tip prune to stimulate bushy new growth.
Bring Indoors Before Frost
When nighttime temps drop below 50°F in fall, it’s time to bring plumeria plants inside. Please place them in a sunny window until spring.
Watch for Pests Like Mealybugs
Check regularly for sap-sucking pests like mealybugs or scales. Remove them with a strong water spray or use horticultural or neem oil.
Caring for your plumeria correctly will keep it thriving for years to come!
Troubleshooting Problems With Plumeria Cuttings
Don’t be discouraged if your first batch of plumeria cuttings fails to root or thrive. Propagation success improves with practice! Here are some common problems and solutions:
Problem: Cutting wilts, rots, or dies
Solution: Use a sterilized tool, discard rotted parts, keep water clean, and provide warmth
Problem: Few or no roots form
Solution: Take cuttings from new growth, use rooting hormone, keep warm, give more time
Problem: Small roots but no new leaf growth
Solution: Ensure adequate light and warmth; pot up once well-rooted
Problem: Lower leaves fall after potting up
Solution: Transplant shock is standard, acclimate cutting before moving outside
Problem: New leaves remain small
Solution: Increase sunlight exposure, use a fertilizer, rule out root problems
Problem: White crusty deposits on leaves
Solution: Scale insect infestation. Prune affected parts. Use horticultural oil.
Problem: Leaves yellowing
Solution: Overwatering. Allow soil to dry out between waterings. Improve drainage.
Problem: Stems rotting at the soil line
Solution: Fungal disease. Improve air circulation. Water less. Apply fungicide drench.
Problem: A few flowers
Solution: Insufficient sunlight. Fertilize regularly. Give plant time to mature – flowers on new growth.
Problem: Flowers dropping
Solution: Normal. Pick flowers once the petals start to fade or curl under. Deadhead spent blooms.
Don’t hesitate to remove any cuttings that struggle and try again. With time, you’ll get a feel for the best practices that work in your climate and conditions.
Final Tips for Propagating Plumeria
In closing, here are a few final pointers to help ensure success with plumeria cuttings:
- Take plenty of cuttings – don’t worry about taking too much new growth from a vigorous plant.
- Start cuttings in spring and early summer for best results.
- Patience pays off – allow cuttings ample time to initiate roots before disturbing them.
- Pot up cuttings once a robust 2-3 inch root system develops.
- Acclimate potted cuttings gradually before placing them outside.
- Provide optimal sunlight, drainage, water, and humidity for the fastest growth.
- Learn your microclimate – understand your location’s optimal outdoor growing season length.
- Bring plants indoors before temps drop below 50°F to avoid cold damage.
With proper propagation and care techniques, you’ll enjoy an endless supply of beautiful, exotic plumeria plants grown from cuttings harvested from your collection!
Frequently Asked Questions
1. How long do plumeria cuttings take to root?
In ideal warm conditions, plumeria cuttings can root in 4-8 weeks. Cuttings taken in fall or winter may take 10-12 weeks. Patience is required!
2. Can I root plumeria in water or soil?
Rooting in water is most accessible for beginners. Change the water every few days—once rooted, pot up in free-draining soil. I am rooting directly in soil works, too.
3. Should I use rooting hormone on plumeria cuttings?
Rooting hormone is optional but helps speed up the process. Dip the cut end in powdered hormone before placing it in water.
4. How can I accelerate rooting?
Bottom heat, high ambient temperatures (70-85°F), high humidity, bright indirect light, and using young growth all boost success rates.
5. How long until my plumeria cuttings bloom?
Most plumerias bloom when the plants are 2-4 years old, but miniature varieties may flower their first year. To encourage flowering, ensure optimal care.
Don’t hesitate to take lots of cuttings – plumeria propagation is an addicting and rewarding skill to practice!