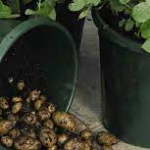
Roses are one of the most beautiful plants we can have in our garden. We can find your flowers in different colors and shapes. For lovers, they represent a symbol of sincere love. They are the perfect gift to give on Mother’s Day, Valentine’s Day or the birth of a baby. Also, they are ideal for decorating the altar in ecclesiastical marriages and countless events.
Did you know that one technique to get rose bushes in your garden is through grafting rose bushes? If you are interested in applying this and other techniques, you will find all the instructions you need to learn how to graft roses and have a beautiful garden.
How to graft roses?
In this section, we show you how to graft roses step by step. One of the main steps you should take into account before grafting roses is that you must water the roses beforehand. You must have a sharp knife to make good quality cuts and not damage any of the parts at the time of making the graft. Before making the cuts, remember to disinfect the knife.

The type of graft that we show you below is called a gusset graft. For you to do it successfully, follow the instructions below:
- Water the roses where you will make the grafts.
- Prepare the graft receptor pattern. To do this, make an incision in the trunk or branch in the form of “T,” about 2 cm wide and 2.5 cm high. This incision should be made at least 4 cm above the ground.
- Open the sides of the bark outward.
- Prepare the yolk that you are going to graft. Cut the branch that contains the flowers from where you will extract the yolk to remove some remaining wood. This branch is called the stem or bud. The branch should be about 6 mm in diameter.
- Graft the yolk into the pattern, making them match and make the yolk and bark of the pattern in contact.
Tie the graft with raffia or nylon, so that, when it starts to grow, it can easily come out. Leave the cocoon uncovered. - After about 10 days, remove the mooring so that the new plant begins to grow freely and successfully. An indicator that the graft was successful is that you can see the petiole of the leaves after about 15 days.
- When the graft is more than 10 cm, completely cut off the upper part of the pattern.
- If the graft was made in a pot-planted pattern, you should transplant it to a garden the following year so that it becomes a new rose bush and grows with new branches and flowers.
You may like also: Germinating seeds paper towel
What is the season of grafting roses?
In tropical countries, summer or the dry season is the best time to graft roses. This is because it is the ideal season for the sap to flow easily inside the plant, an indispensable requirement for the grafting of roses to be successful.
Now, in countries with four seasons, spring and autumn are the best times to graft roses. At these times of the year, the bark rinses easily without damaging the recipient, thus obtaining the best results.
There are other types of grafts, such as the type of gusset, which favors the summer, because the nutrients have better circulation during this season.
Graft roses of different colors
Through the grafts of rose cuttings, you can get many roses of different colors in the same rose. To do this, you will only need to apply the slit graft technique. Discover how to graft roses of different colors through the following steps:
- Choose the rose where you will make the grafts.
- Disinfect the razor and garden shears you will use.
- Choose rose cuttings of roses of different colors. Remove all leaves and thorns. The cuttings should be from the branches that contain the flowers.
- Do not damage the cuttings knots, because from there, the new branches will come out.
- Leave at least 3 knots in each of the cuttings.
- Choose the pattern branches where you will make the grafts.
- Cut from the tip of the pattern down about 20 cm horizontally.
- Remove the leaves and thorns from the patterns.
Make a vertical cut, halfway across the pattern and down, approximately 3 cm deep. - Take each of the cuttings and make 2 cuts of 2 cm at one end. The tip should be in the form of a palette, with the soft part of the branch exposed.
- Insert the cuttings into the patterns, so that the soft parts are in contact.
- Take packing tape and tie each of the grafts, so that they do not fall out and do not enter moisture.
- Line the cuttings with tape, trying not to cover the knots.
- If the grafts remain green after 2 weeks, the process has been a success!
- Wait 20 days and remove the tape from all cuttings.
Steps to graft roses inside the house
The grafting of a rose can occur through cuttings, stems, stratification and grafts. What type of graft is best suited for the rose? Undoubtedly, the most appropriate type of graft is the type of shield or gusset that is T-shaped. The best time to graft the rose is from May to June. So, let’s see how it is done next.
You may also like: How to make wood floors less slippery
With a grafting knife, we take the bark of the rose bush that we are going to graft, and about 10 cm from the ground, we make a T-shaped incision 2 cm wide by 3 cm long. With the tip of the knife, you will have to lift the bark gently.
Take a branch of the variety of rose you have chosen to make the graft. It must be at least 8 mm in diameter, remove the leaf from an outbreak leaving a petiole portion approximately 1 cm long.
Disinfect the graft knife with alcohol and then use it to remove the bud from the branch of the chosen variety. To remove the cocoon, first, make an incision 2 cm above the cocoon and a second incision 2 cm below. With the knife, it starts from the upper incision and slides towards the lower incision to cause the cocoon to detach, which will have the shape of a shield.
Prepare the graft by removing the remaining fibrous part and put some grafting putty. I insert the graft in the T – shaped incision that made to the start. The upper part of the graft protruding from the cortex of the T-cut should be cut. Apply a little more putty to the level of the cut.
Using some raffia, wrap the graft leaving the cocoon discovered. If, after about 15 days, we see the petiole of the leaves. The graft is rooted. The raffia will be removed after at least three months.